Chronicle of a 1981 Harley-Davidson FLTC Sleeper Project
Chronicle of the Rubber Shovel Project: Alice
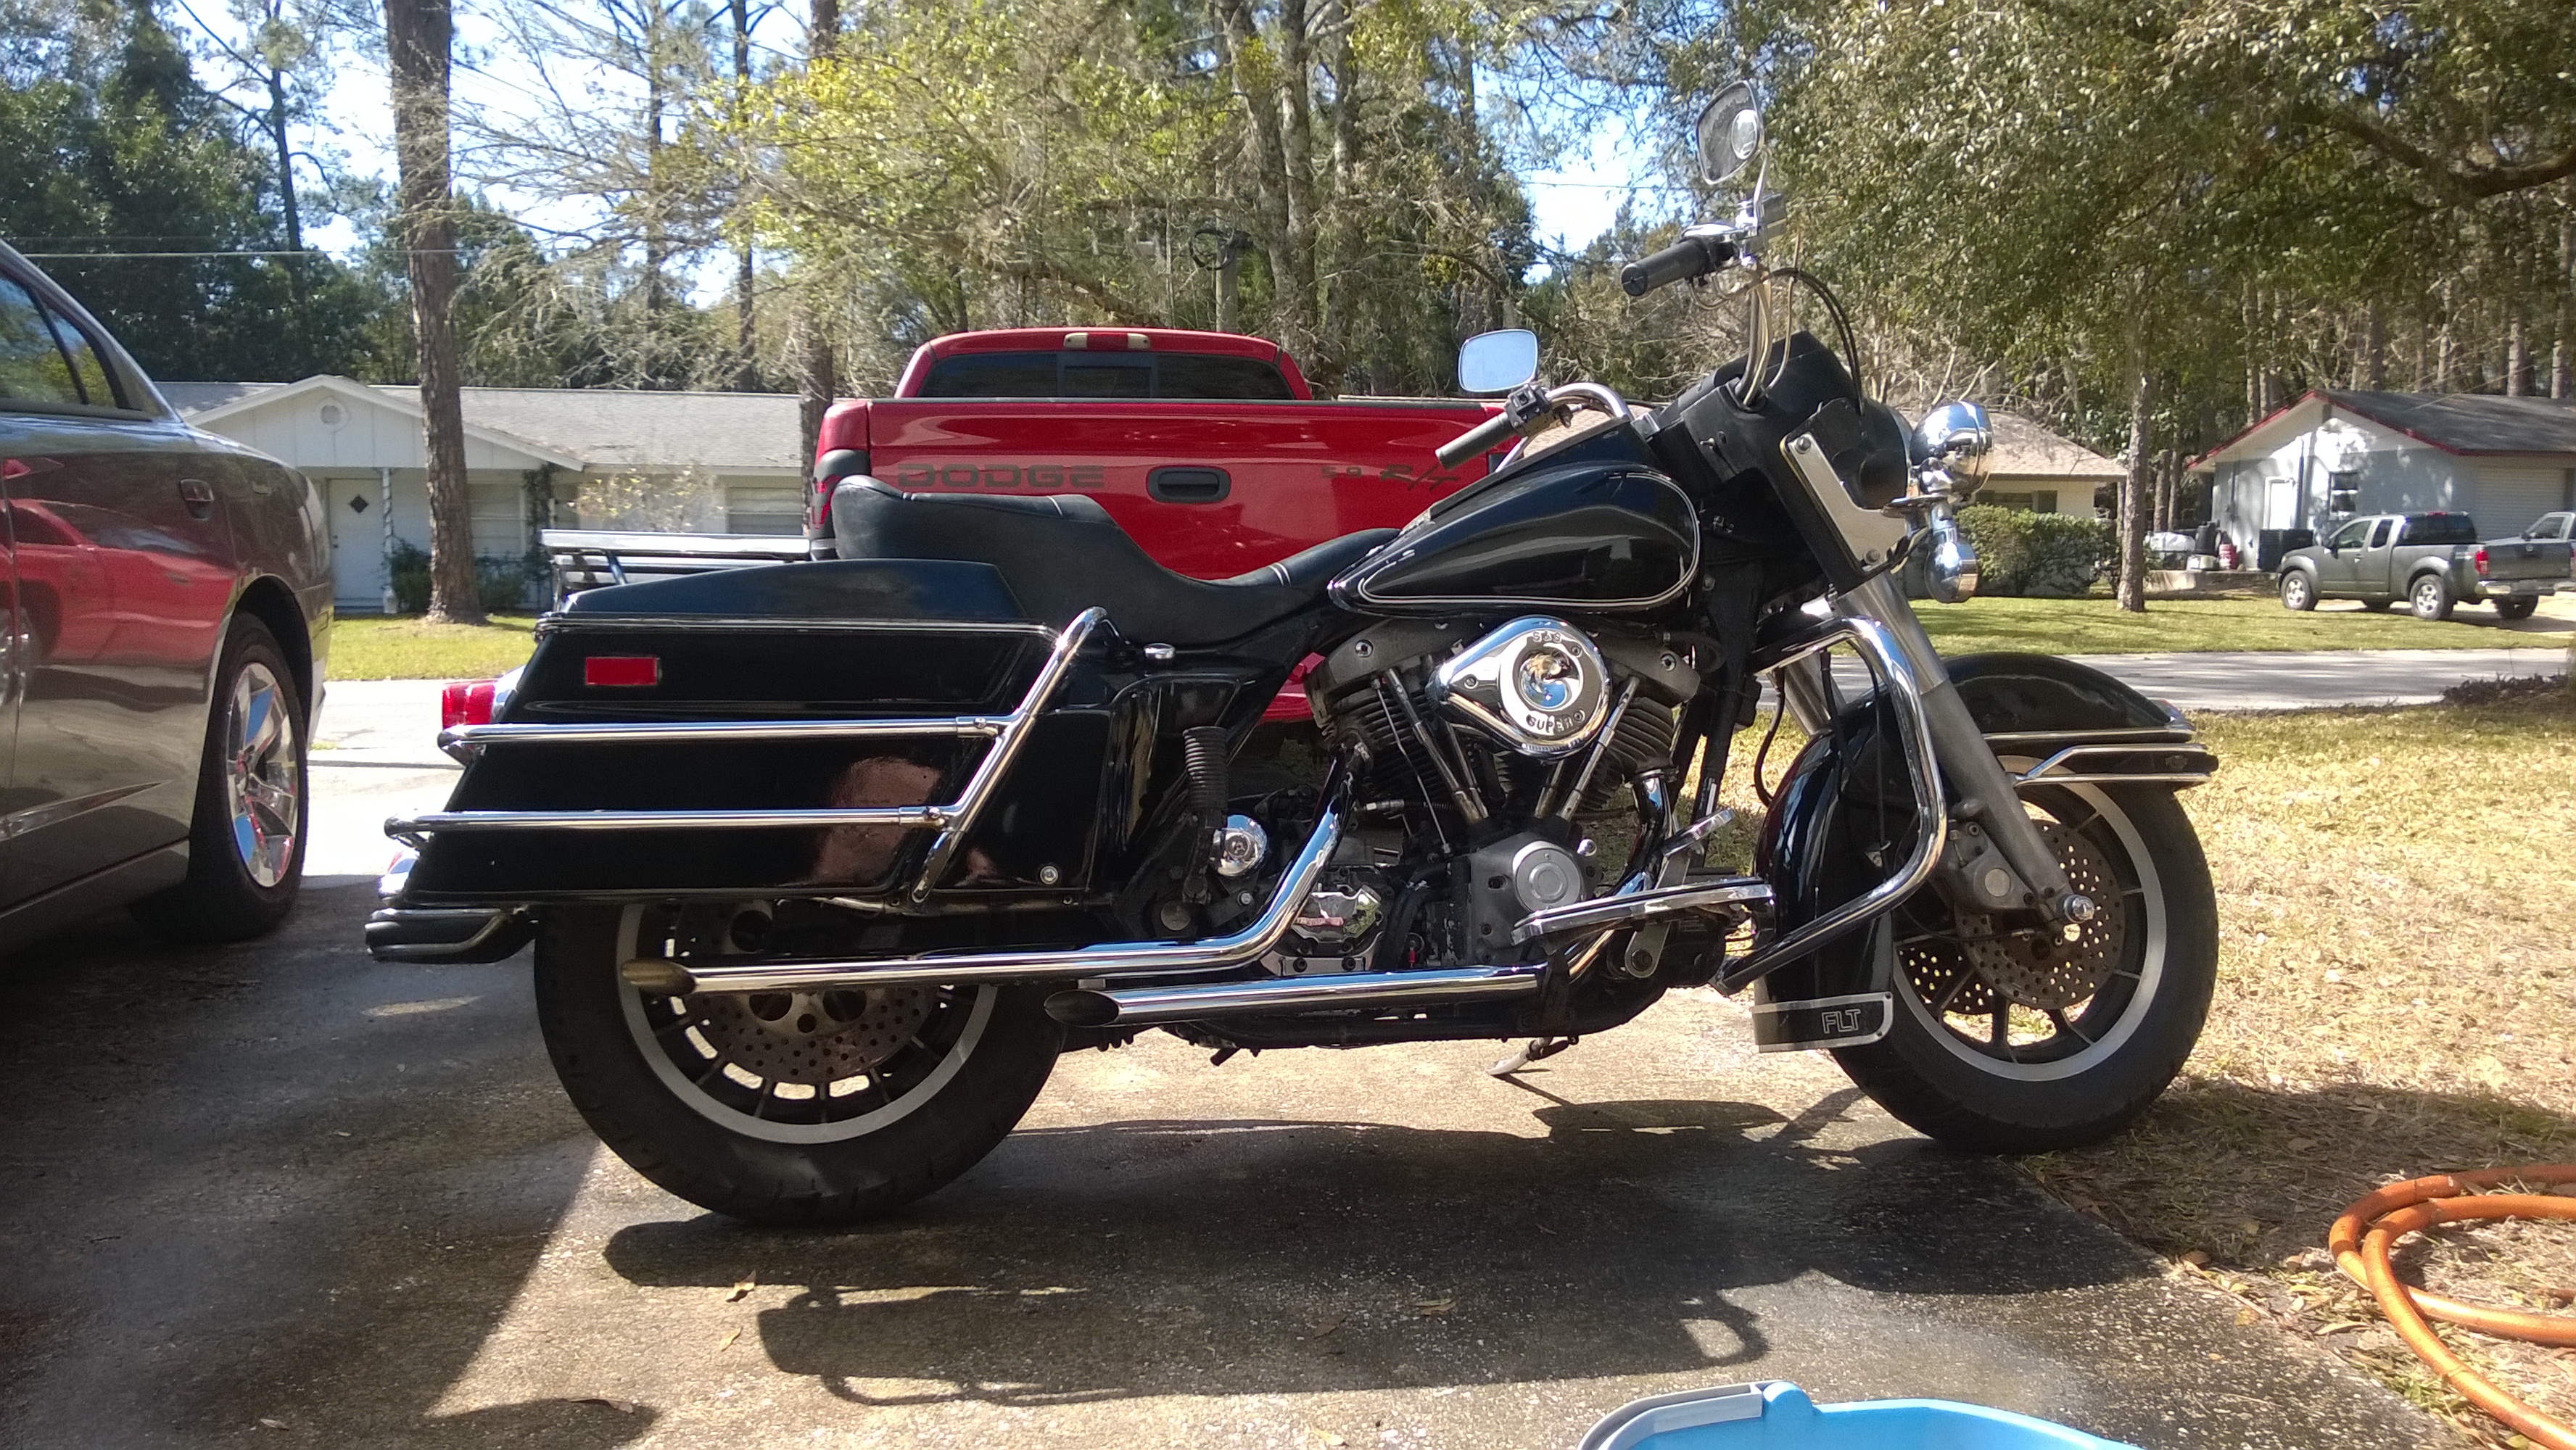
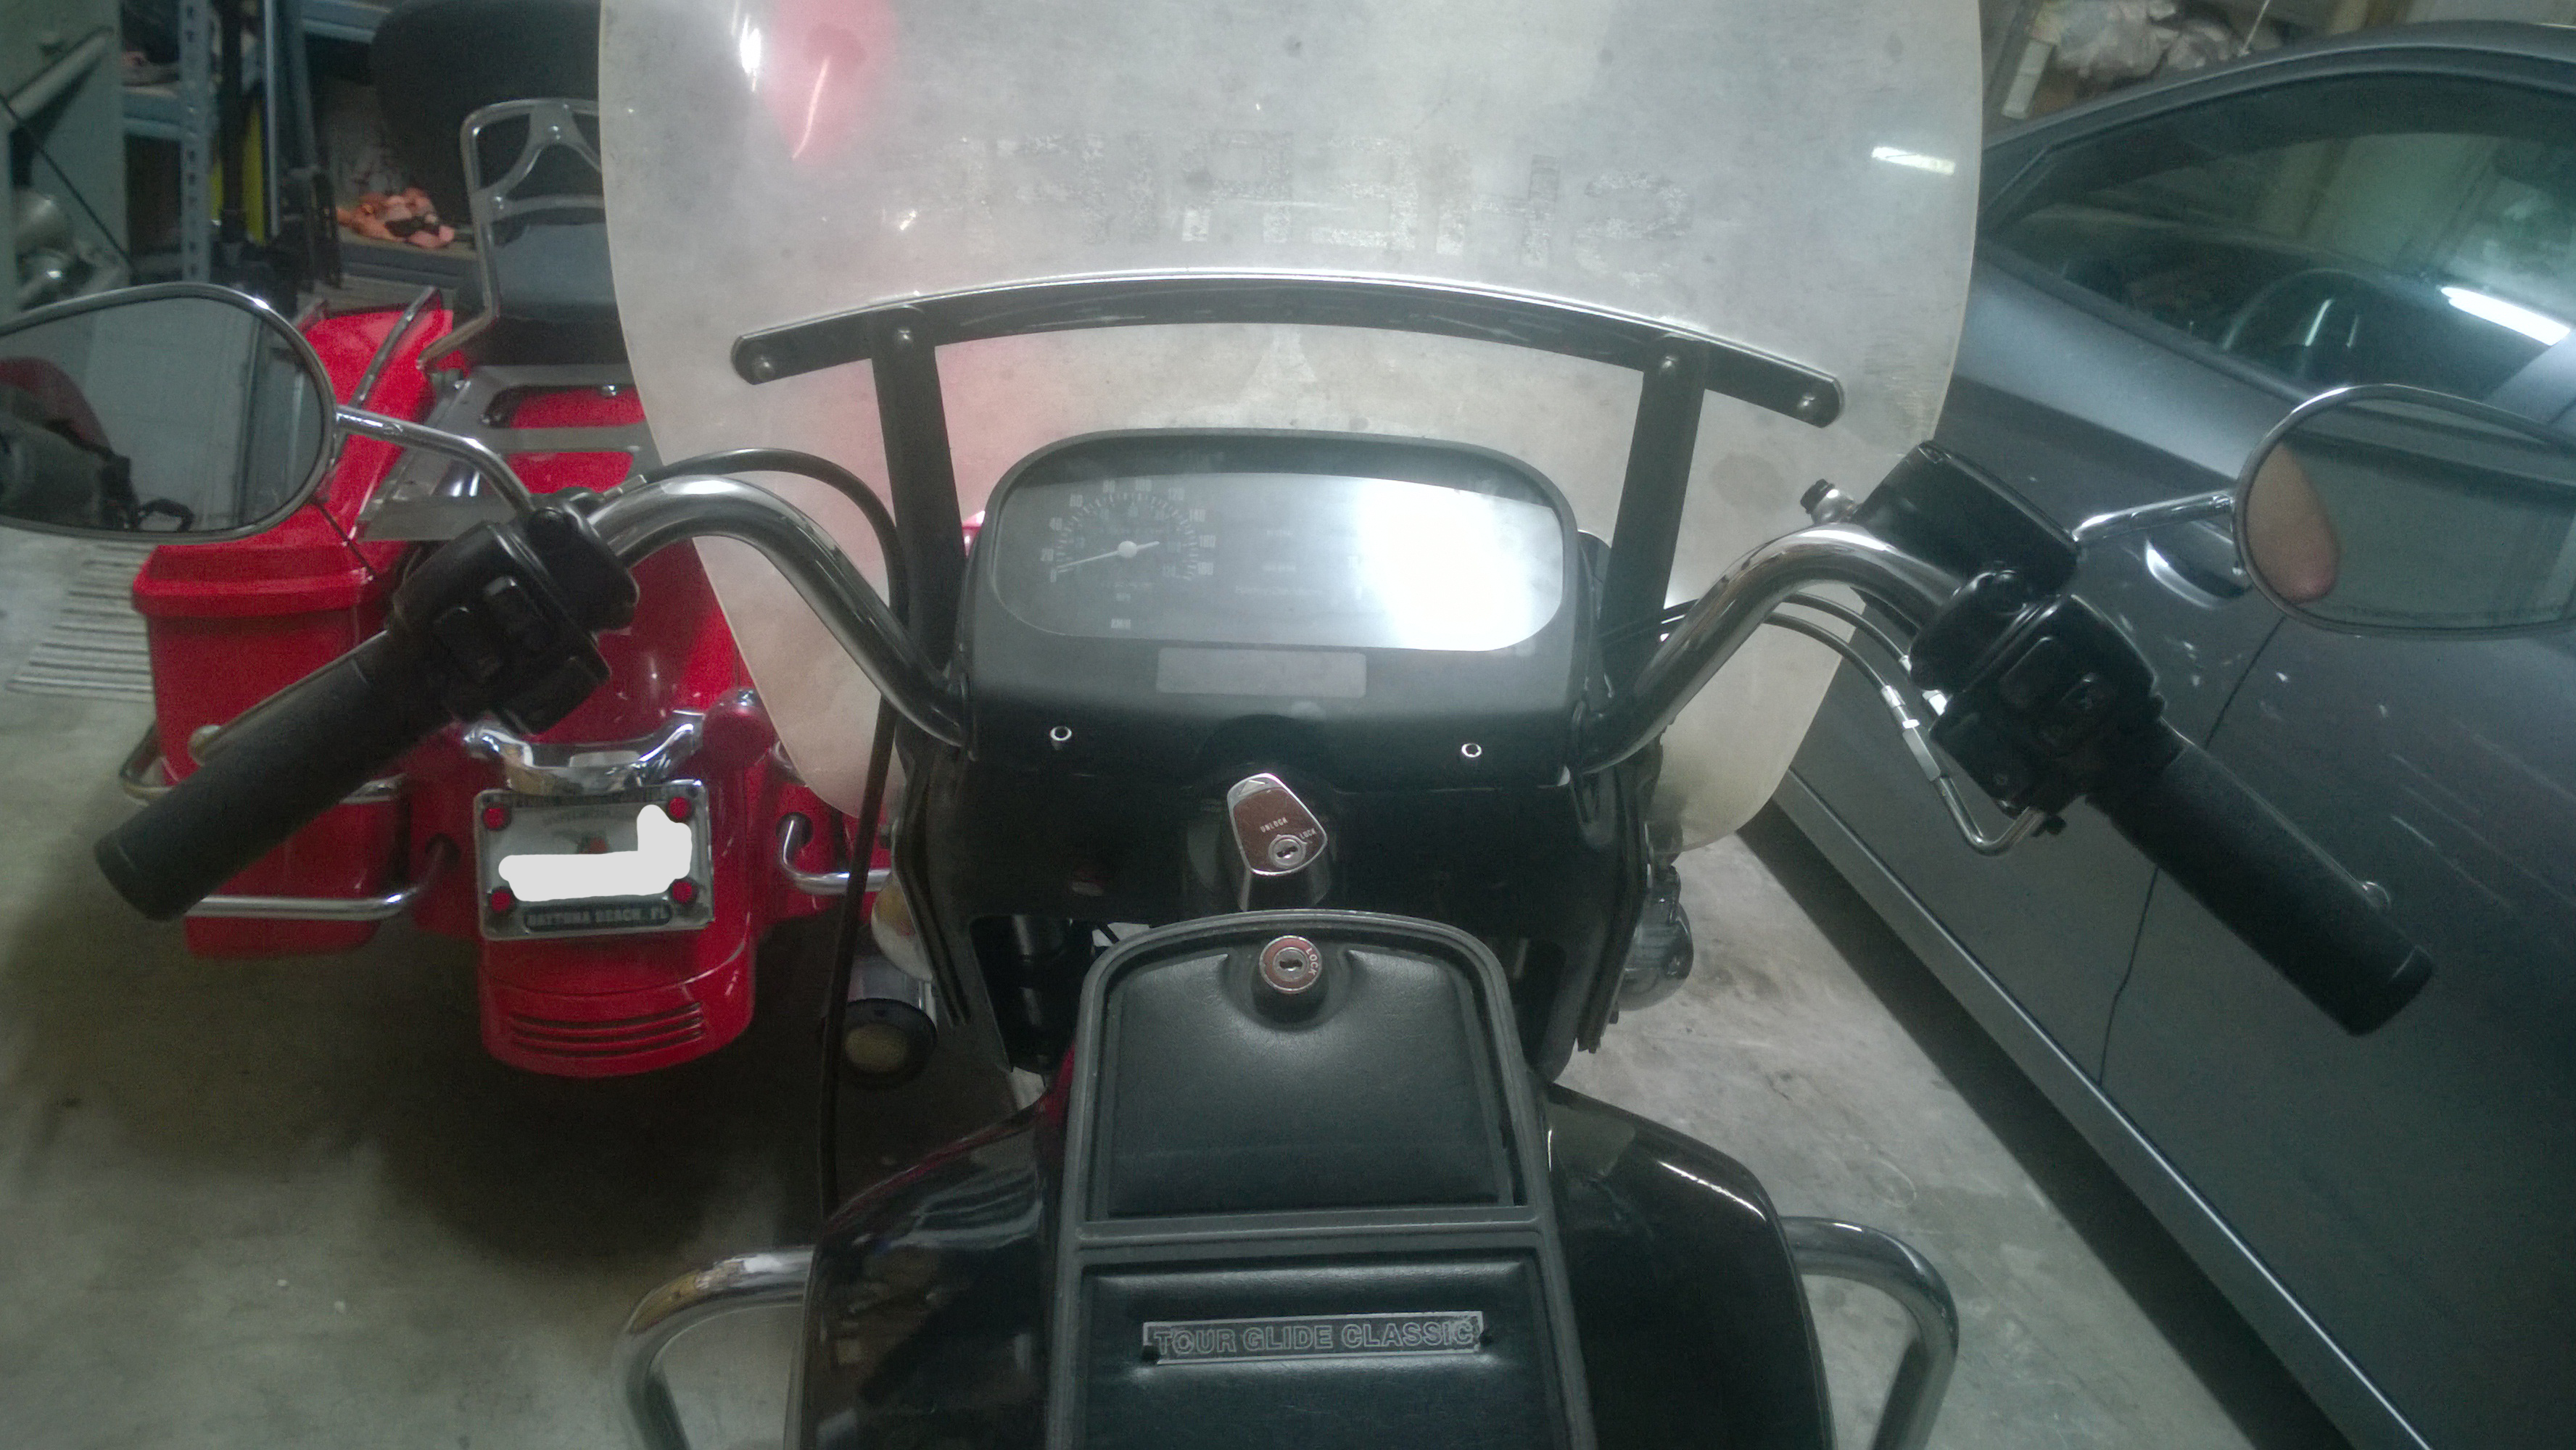
Black 1981 Harley-Davidson FLTC - Tour Glide Classic
Alice Arrives at Her New Home!
It's a Shovelhead Damnit!!! - February 2nd 2016
While she looks to be intact the reality is that there has been much amature tinkering and abuse, as many of the bolts are missing, loose, or otherwise randomly butchered. She's been lowered (ick), the front turn signals are missing, and the windshield is shattered. Not to mention she's also been sitting for close to a decade. Oh yeah, and since the rear seat mounting bracket is also to be listed amoungst the missing, I damn near lost the very hard to find (and nearly pristine) seat on the way home (shit..).
But she's mine, she's home, and it's time to get started!
Wiring and Hoses are a Complete Catastrophy...
February 10, 2016
Trip to AutoZone:
| Dot 5 Break Fluid | $9.99 |
| 3' of 5/16 Gas Line | $4.77 |
| Pack of Hose Clamps | $2.49 |
Current Project Cost: $3,017.25
February 11, 2016
Trip to H&B Cycle:
| Carb Rebuild Kit | $24.00 |
| Intake Manifold Gaskets | $10.00 |
| Tank Mount Cover | $6.00 |
| Rear Seat Mount | Free |
Current Project Cost: $3,057.25
February 12, 2016
Trip to AutoZone:
| 12' of 3/8 Oil Line | $24.00 |
| 2' of 1/4" Gas Line | $2.00 |
Current Project Cost: $3,083.25
The 35 year old factory original oil lines were so hard they literally shattered during removal
Working late Friday night - and lacking a stand/lift - drastic measures had to be taken at 1:00am
Note: In my defense, she is laying on carpeting..
February 13, 2016
Trip to AutoZone x2:
| 3/8x1/4NPT Fitting | $1.99 |
| 3/8x1/4NPT Fitting | $2.19 |
| Pack of 4 Hose Clamps | $3.96 |
| Permatex Ultra Copper Sealer | $7.49 |
| Roll of 12 Gauge Black Wire | $6.99 |
| 12 Gauge 3/8 Ring Terminals | $3.49 |
| 12 Gauge #10 Ring Terminals | $1.49 |
Current Project Cost: $3,110.85
Saturday was a 16 hour marathon exploring Alice's overall condition as well as deciding how much of what could be reused. The oil lines - with the exception of a few Band-Aids - were all OEM, which is to say they were 35 years old, and hard as a god damn rock. Several of them literally shattered when they were forced to move ... And the rest were complete shit.
But in the interest of doing first things first, my primary objective at this point is to see if the engine will still turn, run, and - best case scenario - run well enough to rider her a bit while trying to collect funding for other aspects of the project.
End of February 13, 2016 - Saturday Night
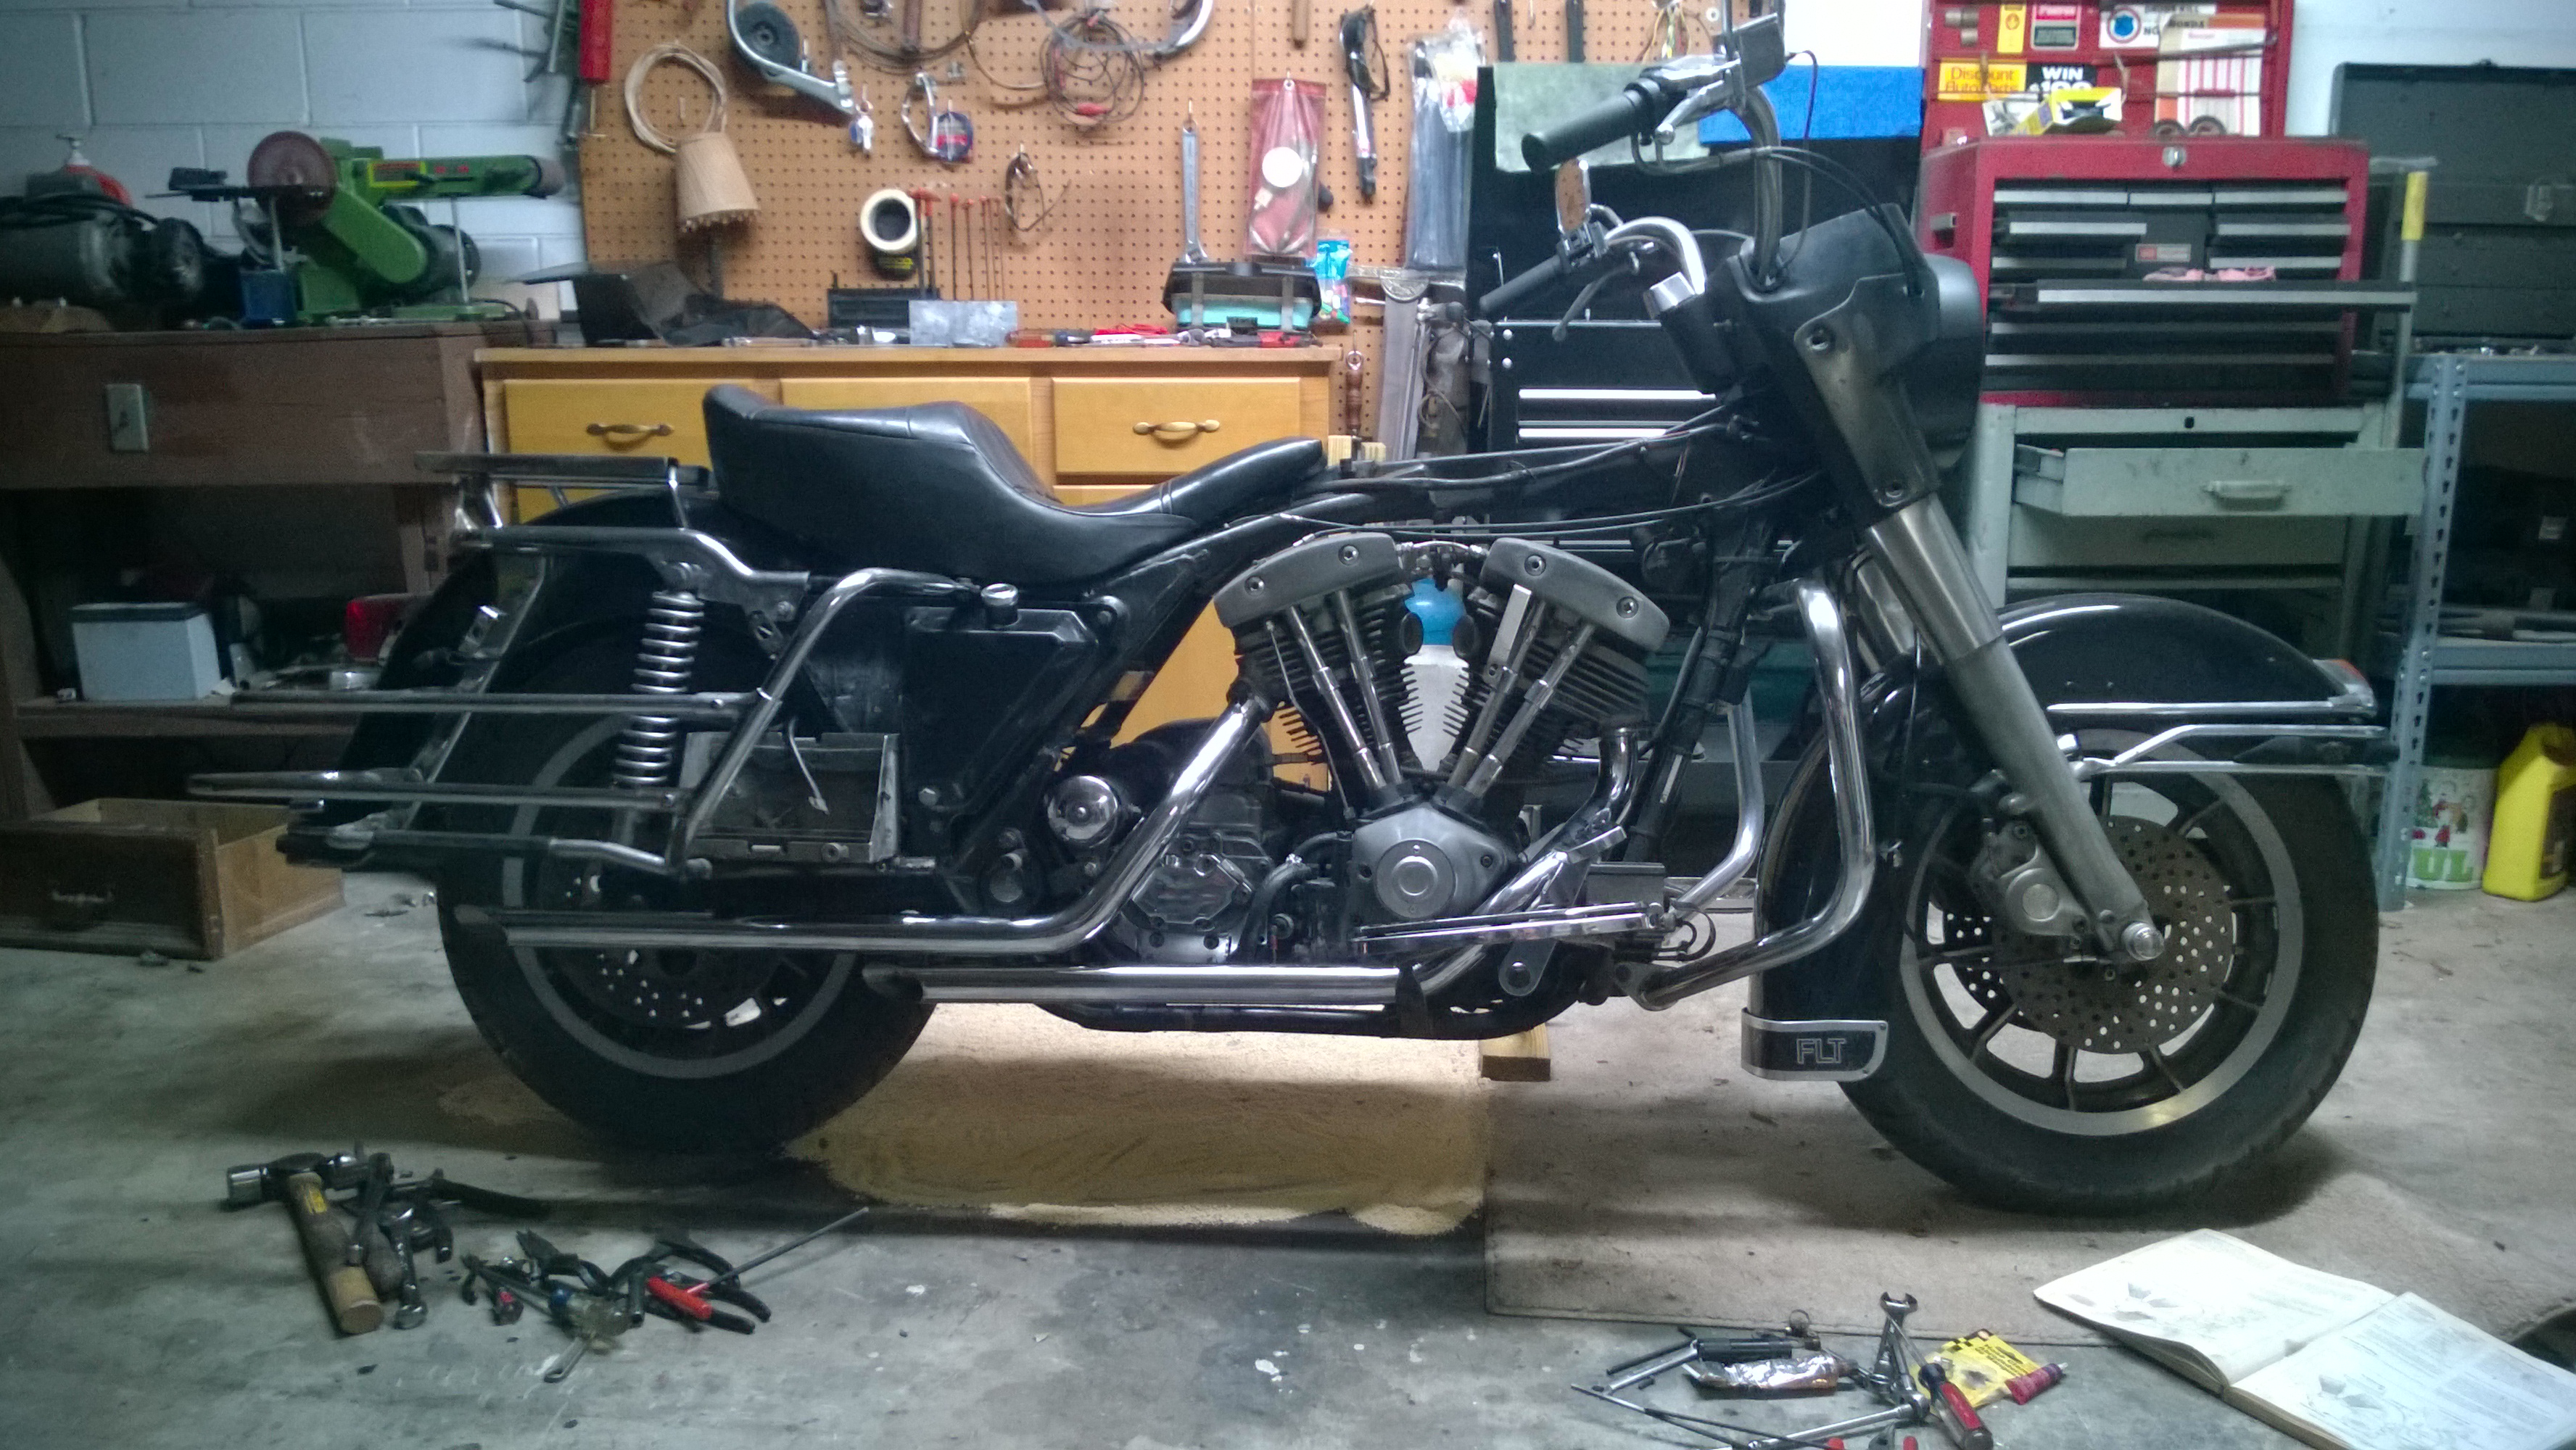
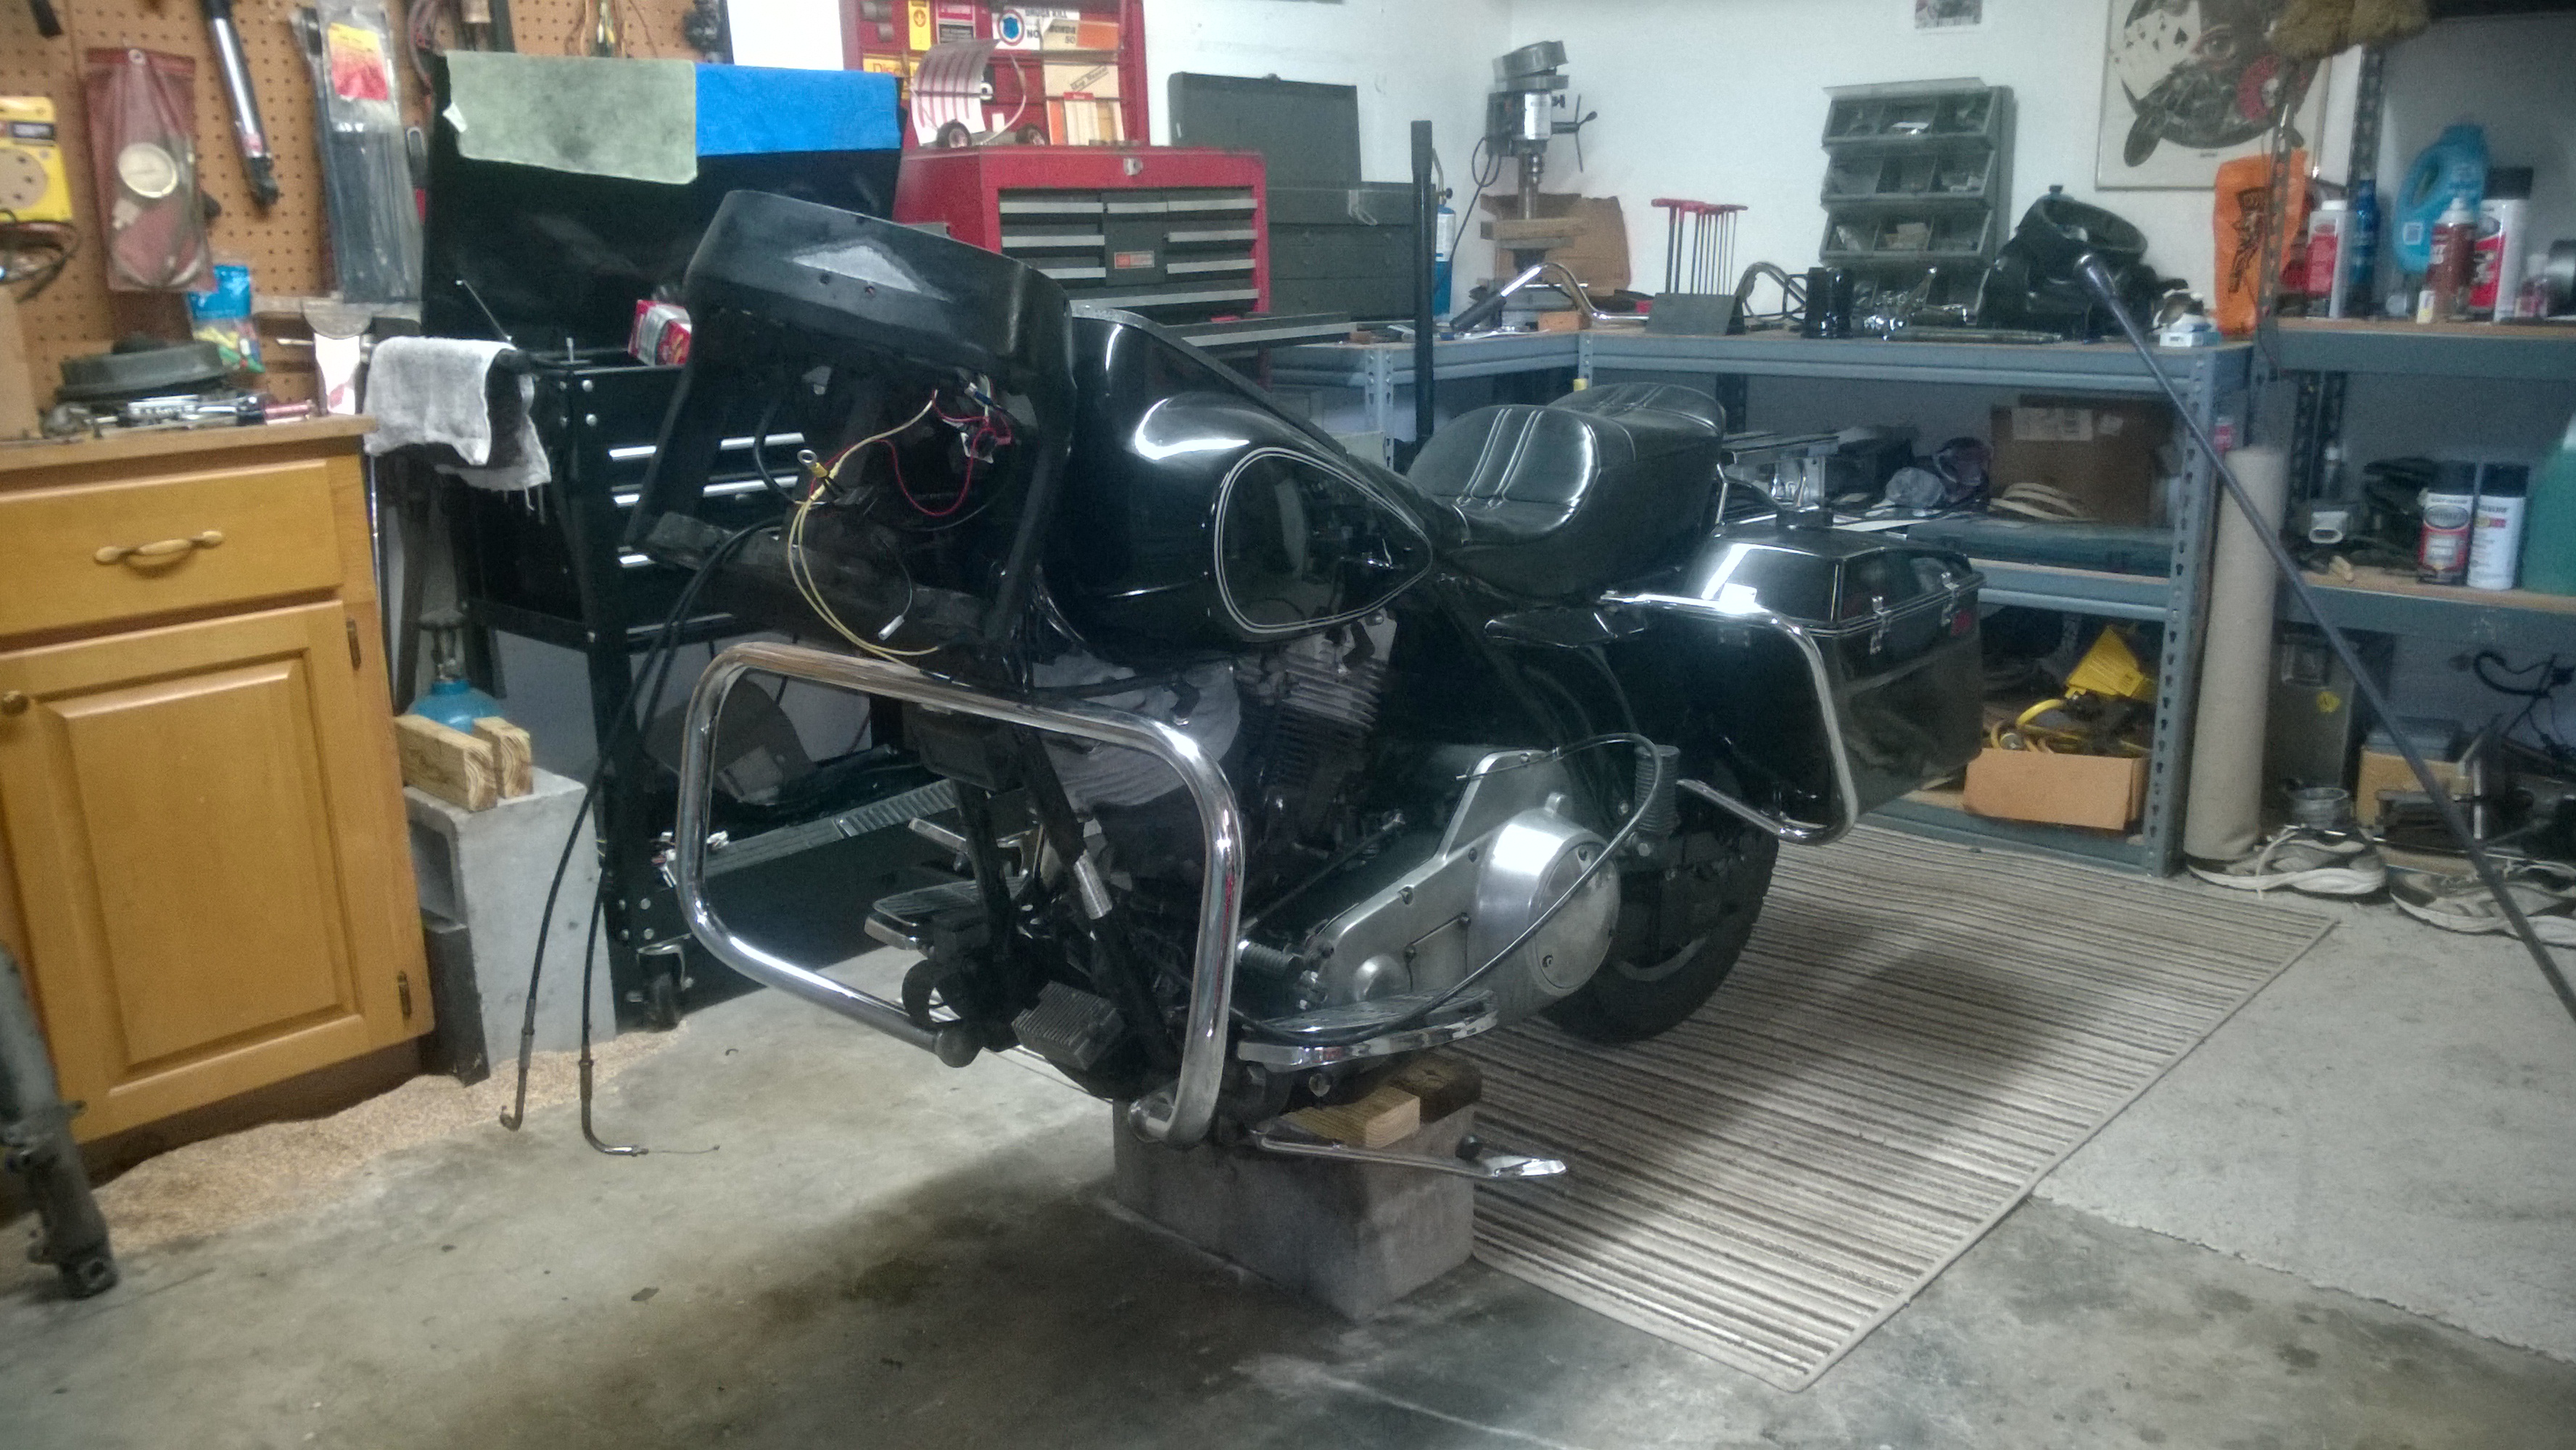
Back on her feet with oil lines and wiring squared away.
The seat is on because I just had to sit on her to see how she felt with the cornering clearance robbing lowering kit finally removed from the rear. It's suprising how much taller she feels than Trixie, my 2010 FLTRX.
And since I've never liked chrome, the headlight nacelle is now a black donor from my old 87 Evo FLHTP. Also of note in that (police bike leftovers) donor package (aside from the turn signals), was an "offroad use only" racing halogen headlight with a 100 watt low beam, a 140 watt high beam, and 2 50 watt spot lights. Which makes for enough lighting to run 120MPH+ on a moonless night (or so I've been told..).
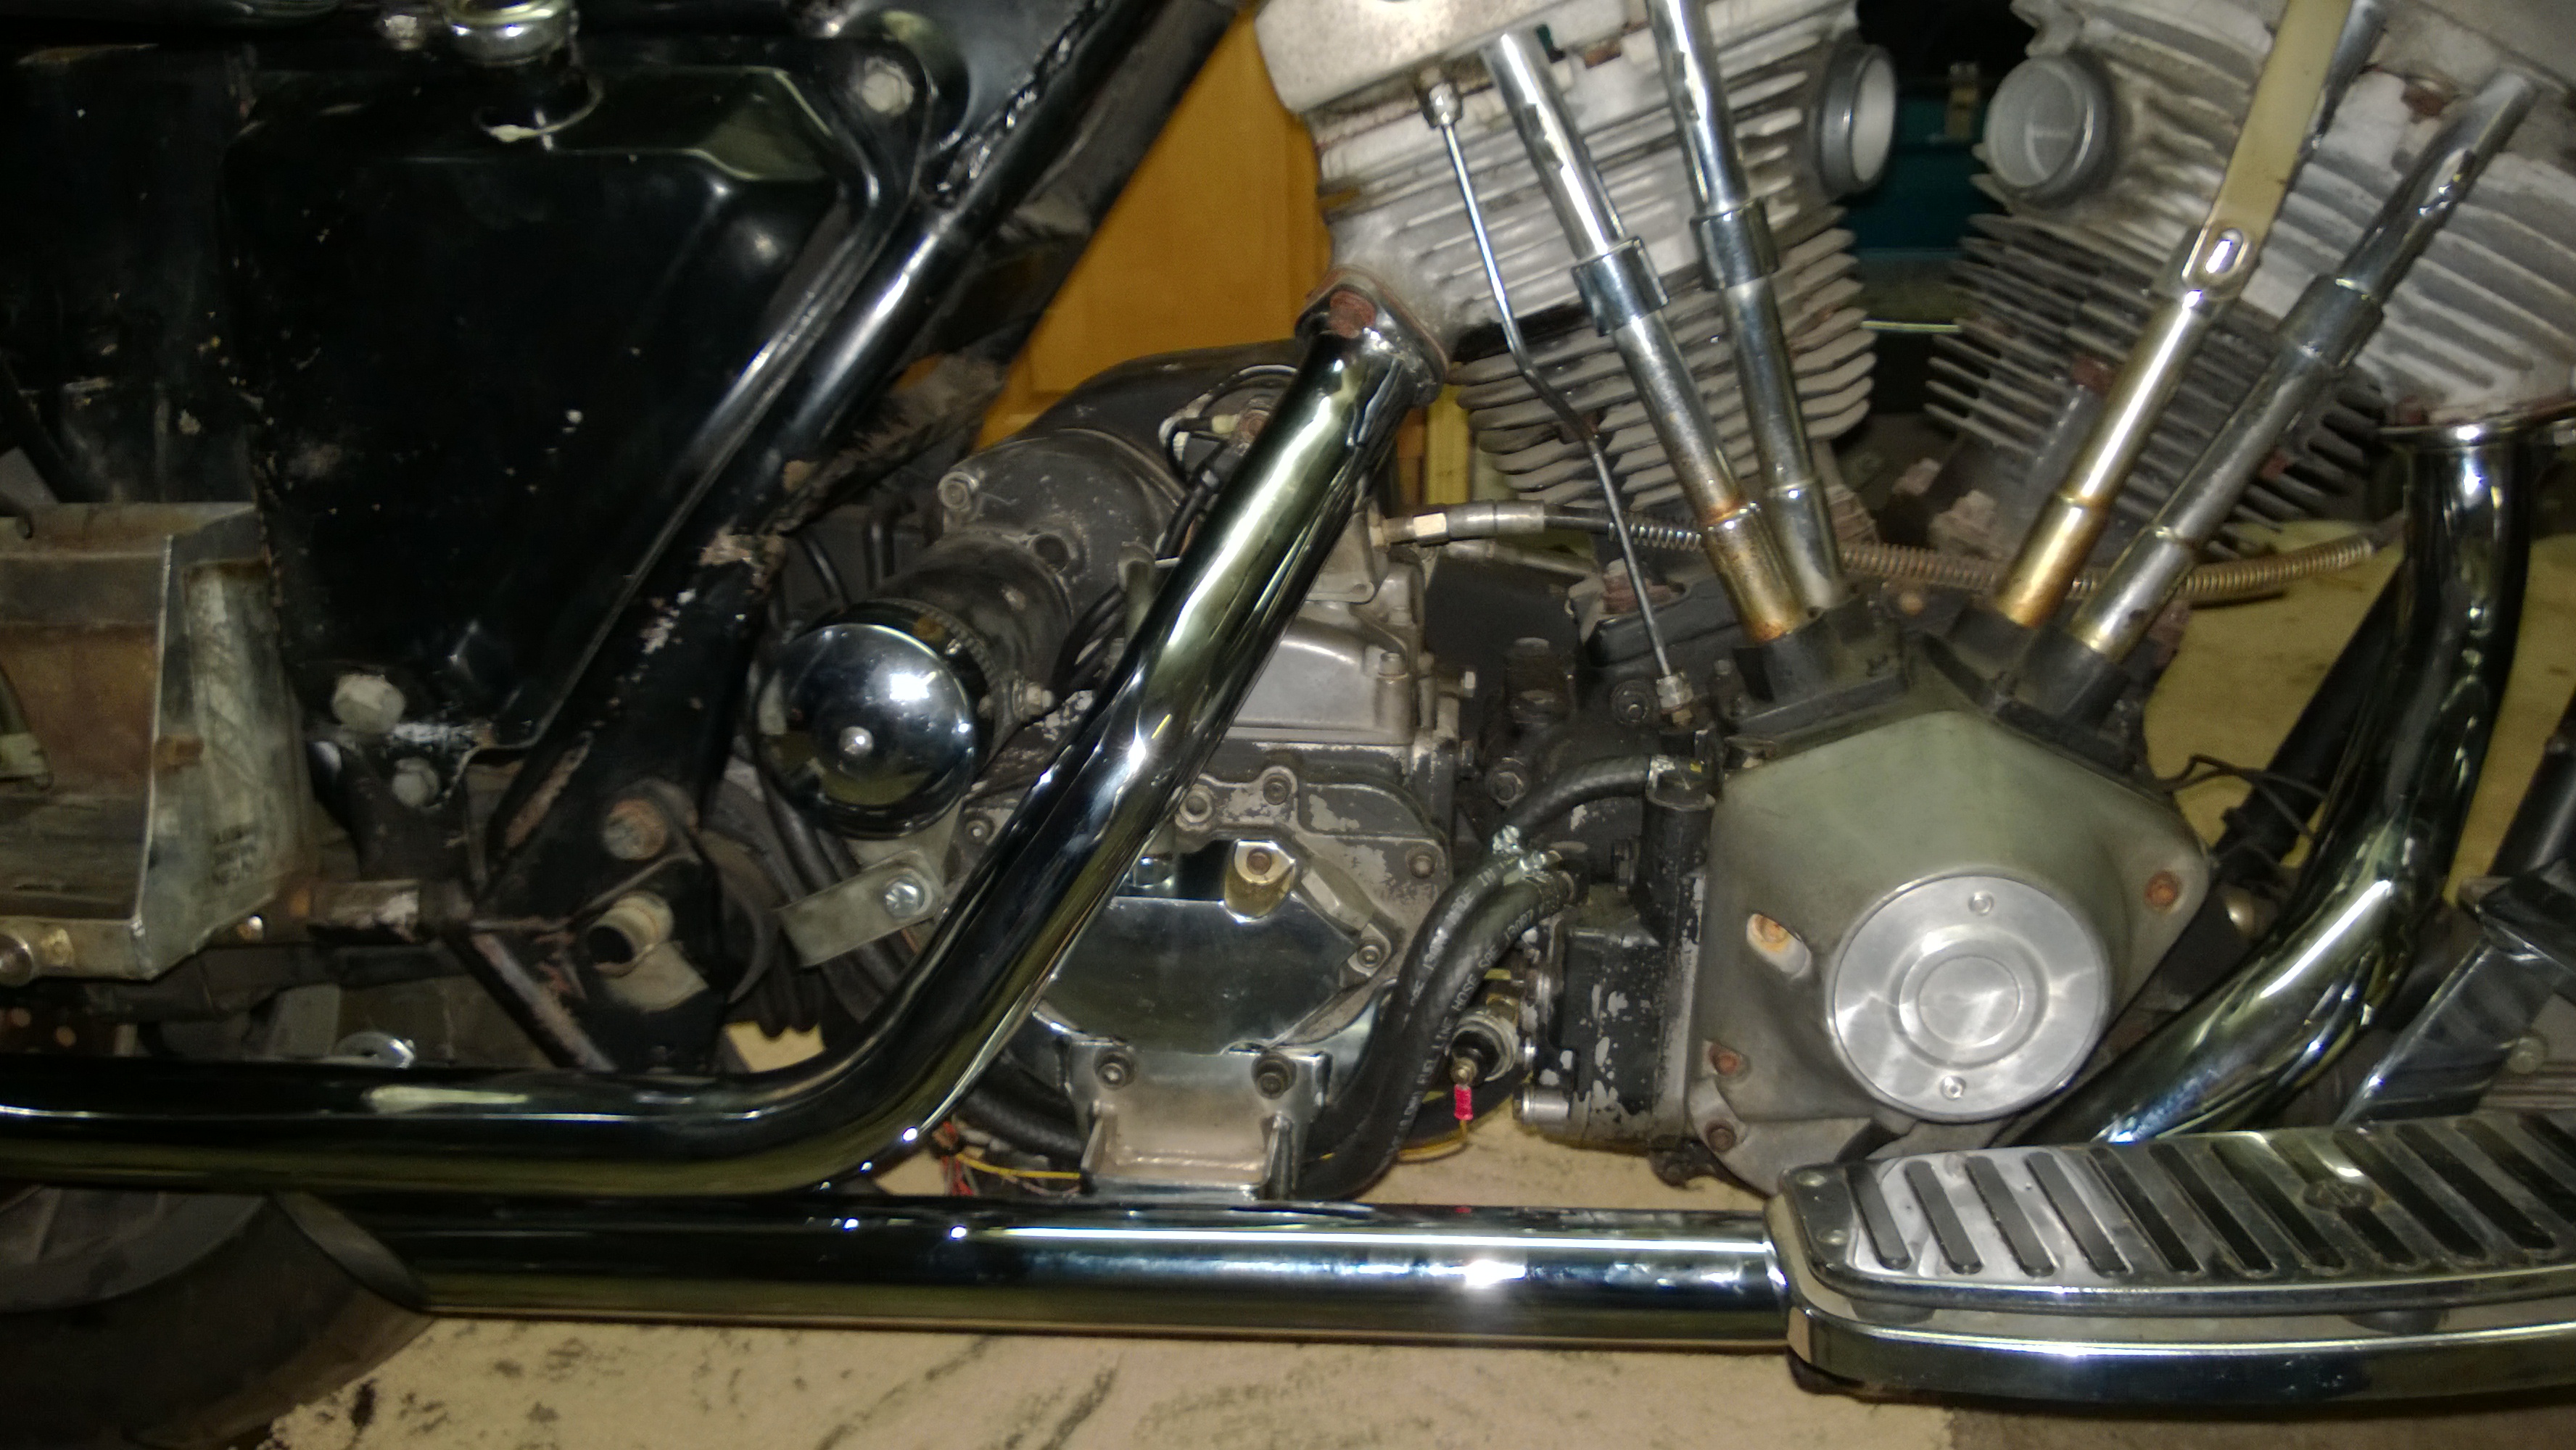
All wiring is now cleaned up and tucked away - under the starter - where it belongs.
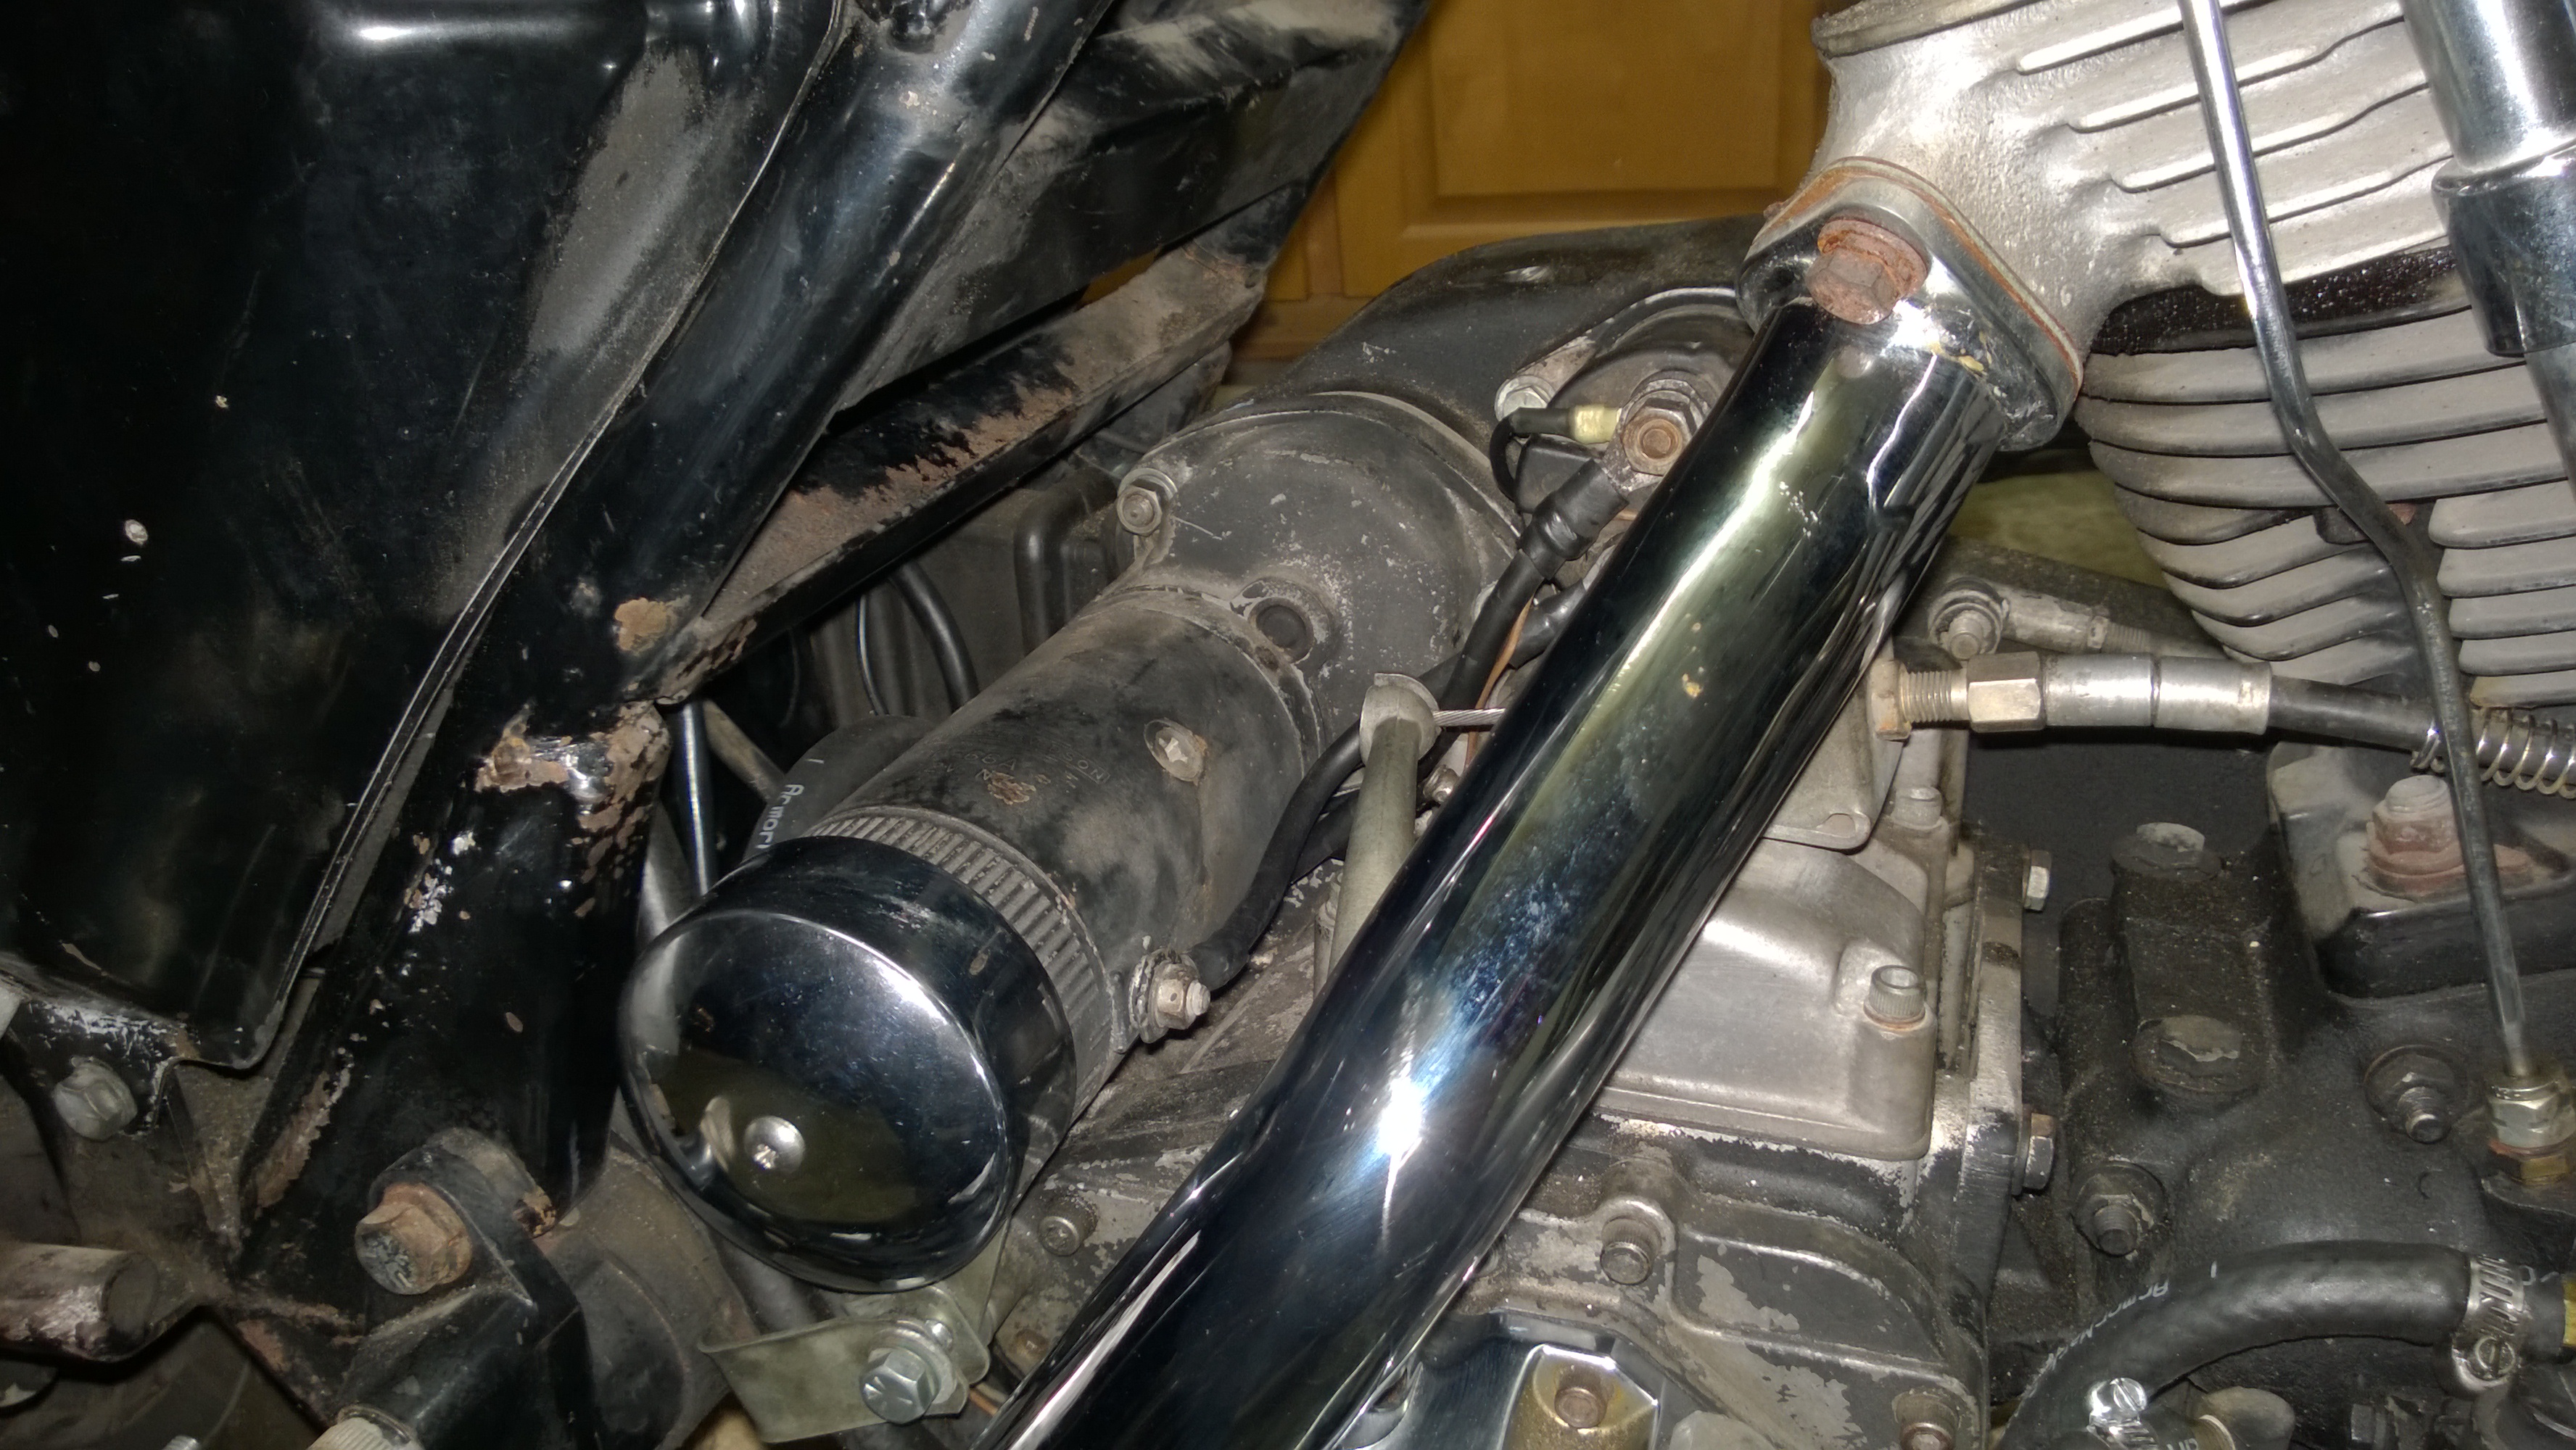
It's all there...It's just finally routed - my way - properly.
End of Sunday, February 14, 2016

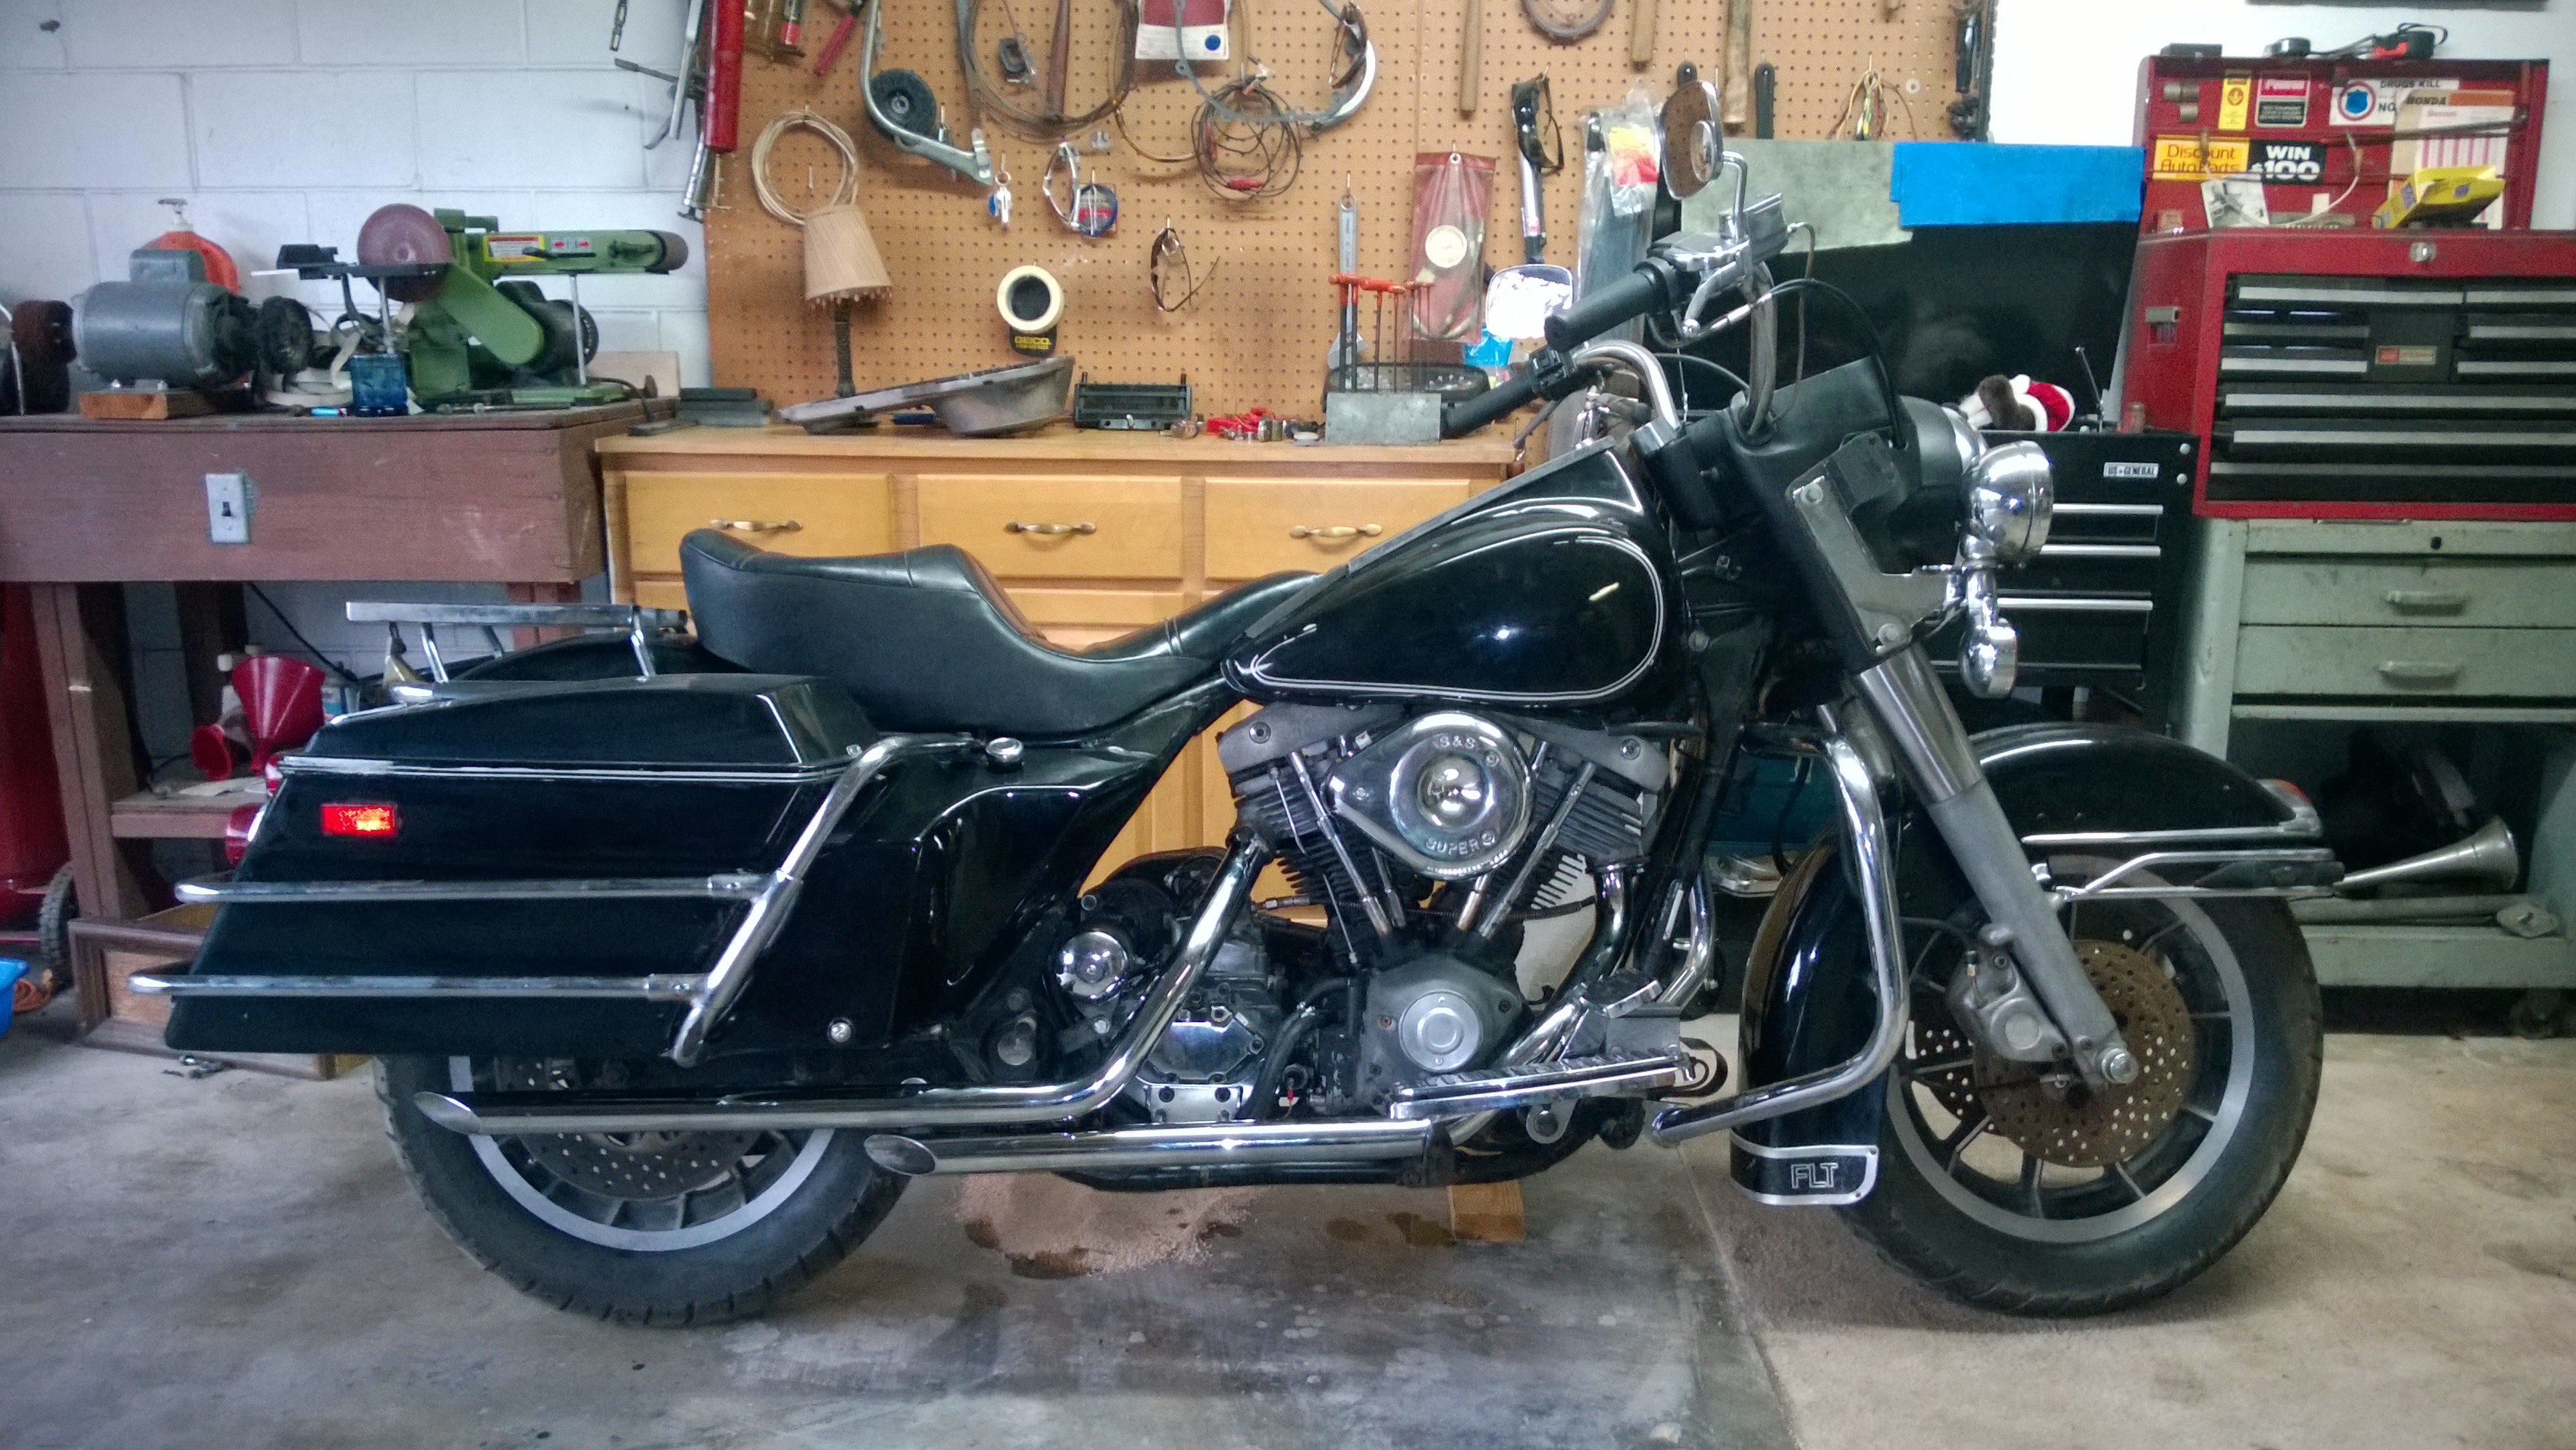
Alice is back to looking like a motorcycle! She now has all her lighting, and most of a rebuilt carb.
I say most of a rebuilt carb because the kit I picked up earlier was for the stock CV carb, and not the S&S performance carb she's actually running. So... That required another trip to H&B to swap out the rebuild kit for the bits I actually needed.
Shit Happens...
February 16, 2016
Trip to AutoZone:
| Duralast Gold ETX18L Battery | $108.65 |
| 3 quarts of Cheap Oil | $5.97 |
| (because most of it will end up on the ground) |
Current Project Cost: $3,225.47
Plans of finally starting Alice were cut short during reassembly when I discovered that the starter shaft was an 1/8" to long. Which at least explained why the thrust washer had been omitted and a cardboard (Yeah ... CardBoard) shim had been inserted between the starter housing and the inner primary. Assembling things properly brought to light why the (Jerry-Rigged) shortcut had been taken.
WTF!?!
This would be resolved the next day with a heads-up swap for the correct shaft.
So since nobody seemed to have a replacement for the missing inner primary's 3/8 pipe nipple bulkhead fitting for the
primary chain oiler ... Yes, I'm going back That Stock. I had to adlib just a bit myself...
Note: This will be corrected properly later when I can find the right damn fitting.
The first few stabs at the start button resulted in only the starter relay clicking, because princess wanted to be finicky right to the last minute as punishment for the previous sins of her prior crewel master(s). Three solenoid swaps and an old school - road side style Band-Aid - repair later, she finally decided to roar to life with a 2,000rpm idle speed ... And a truly phenomenal lack of any visage of engine noise. No piston slap, rocker knock, or valve ticks to be heard. She was just as quiet as her 14,672.9 mile odometer reading implied she could/should be!
Milestone 1: February 17th 2016 - Alice Lives!
Although mildly incontinent - damn sticky float needles... - After spending many years
wasting away in some warehouse boneyard Alice is now finally running again!
February 19, 2016
Trip to AutoZone:
| 1/4" Break Line for Primary | $4.99 |
Current Project Cost: $3,230.46
Milestone 2: February 20th 2016 - Alice's First Ride!
While the clutch slipped so badly - cause currently unknown - We could barely make it down the street.
Alice did successfully manage to make it around the block and back home under her own power!
Alice sitting in the sun after her first bath in a very, very long time.
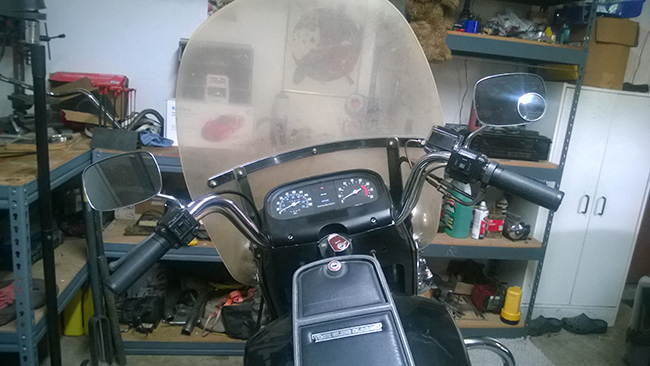
Now we just need to do something about the damn windshield!
...And the Clutch - Really gotta figure out WTF is wrong with the clutch.
Top speed is currently about 45MPH - Zoiks!
|
Note: The original intention was to have Alice be completely original with the stock frame mounted FLT (Shark Nose) fairing. But I always liked the way that my 87 handled with lighter FLHTP windshield, so I'm a bit On-The-Fence as to which way I'll ultimately go with Alice at this point. |
The Clutch and Etcetera...
Yet another chapter in the WTF were they thinking chronicles...
Here's a Question: What Happens When Some Idiot Tries to Adjust the Transmission Shift Alignment With a
Rat Tail Bastard File?? Finding a Gear - with a shift throw somewhere in the 6" range - was Like
Trying to Stir Chili with a Feather..
So after her bath, Alice made a mess on the garage floor ... That went well beyond the popular 'Marking one's spot' excuse. This - of course - resulted in further exploration into the cause of said behavior...and quickly turned into a huge can of worms.
In addition to the horrifyingly liberal use of Blue Water Pump Sealer on the inner primary, and the two missing bolts. None of the enclosed chain housing bolts were actually tight ... Except for the one, which was tightly wedged into the dirt that was packed into the threads it was partially jammed into. Now by jammed I mean it was over torqued into its hole about an 1/8 of an inch from actually properly bottoming against the part it was intended to be holding in place. Suprisingly...nothing was cross-threaded far enough to completely ruin the threads.
Inside the primary was - of course - no better as the compensator nut was - Best Guess - Put on with Hatred, and torqued down to Blind Rage with a device that was probably designed to be used on mining equipment. My trusty - never fails - 1/2" Dewalt Electric Impact failed to budge it ... Even after it had been heated with a propane torch for damn near an hour. The only thing that did finally break the compensator nut loose was a 3/4" pneumatic impact that I had to buy solely for the purpose of getting this God Damn thing off. And that was only after jacking the line pressure up to 130PSI on a compressor that was rated at twice the CFM that was supposed to be needed for the tool.
The punch-line of this story was that while the compensator nut was over torqued far beyond reality ... Both the Clutch Hub nut, and the Main Shaft Sprocket nut were looser than sparkling fuck.
Costs I Forgot to Add - Until Now
So obviously the shift pawl had to be replaced, and then properly aligned with the shift drum. Then the transmission shift arm got tightened, and the stock linkage, being stock linkage - e.g. basically total crap - was (of course) flopping around. So the OEM ends got replaced with a pair of Heim Joints from SpeedwayMotors.com (SwM PN: 1750222) ...Which finally got the damn shift throw back in the range of humanly fucking possible.
Now we have a shift throw that is finally tight enough to be done with ones heal still on the floorboard ...(where it belongs)... Instead of having to lift your foot high enough to be at risk of kneeing yourself in the face while trying to changing gears..
|
Note: If by chance that last bit struck you as being a bit "colorful" ... Yes, I've been drinking... |
February 25, 2016
Online at J&P Cycles:
| In/Out Primary Gasket Set | $43.99 |
| 5-Speed Mainshaft Seal | $9.99 |
Current Project Cost: $3,284.44
We Got By With A Little Help From A Friend...
March 13, 2016 - Last Day of (75th Anniversary) Bike Week 2016
A trip out to a friends house resulted in a donated set replacement clutch plates which were badly needed since the old ones were - rather obviously - completely shot.
|
Side Note: During one of the test rides - half way down the block - Alice spit off one of the saddlebag lids and skipped it down the road. While I did get the lid back (missing some paint), it reminded me of why I converted my 82 FLT to the then new 1984 police style (hinged) saddlebag latches. I was fucking tired of buying $200 replacement lids everytime the damn things blew off. |
And speaking of donated items ... The windshield off my 87 FLHTP (which still faintly says Sheriff) was rescued from the edge of the scrap pile to once again be pressed into service on Alice. It was badly yellowed, but some TLC, SoftScrub, and about 2 hours had it back to being clear enough to look over.
Milestone 3: Alice Finally Hits the Street
Title Issued March 18th 2016 - First (legal) Ride March 19, 2016
After a wee bit - 2 hours - of last minute primping, Alice finally hit the streets for the first time in years. It was a rather short - but very successful - 12 mile ride, which brought to light why the odometer reading on the title was listed as inacurate. It appears that at some point the dash assembly had been swapped out for an aftermarket unit that read primarily in Kilometers per Hour.
I say this, because the US bikes of the time had a completely mindfuckingly stupid - Mothers Against Fun - federally mandated 85mph speedometer. And Alice has a 120mph speedometer that - bizarrely - displays Kilometers per Hour as the predominant (e.g. larger white) scale on the face of the gauge.
So it appears that our little girl has a bit more than the 14,000+ miles showing on the odometer...but exactly how many is unknown. Judging by the sound of the engine, I'd say very few. Judging by the condition of the drivetrain and chassie, I'd say a couple hundred thousand.
She really is a bit of a mystery.
March 21, 2016
Alice's First Day at Work
Notice the bungie cord holding the saddlebag lids in place? I'm not about to trust the stock latches! The hinges are on both the Shopping and To-Do lists ... But not at the top of either just yet.
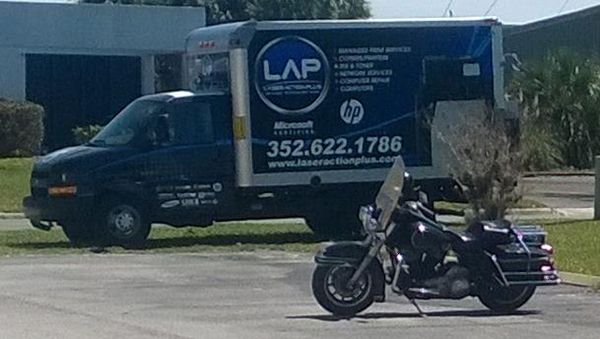
March 22, 2016 - Alice even makes a service call!
Dropped main jet from a 0.72 to a 0.70 - Because in concert with the burbling at 60mph (~3,000rpm) she is way too happy in cold weather...
March 23, 2016 - Alice Runs like shit with the 0.70 Main Jet.
March 24, 2016
Trip to H&B Cycle:
| S&S Air Filter | $24.00 |
| Stock TourPak Mounts | $40.00 |
Current Project Cost: $3,348.44
Alice runs considerably better now with an air filter...which really isn't that suprising in retrospect. But that's the kind of shit you run into when you're trying to make progress while running low on funds.
March 26, 2016
Now need to address chassis alignment issues. Rear wheel is 1/6" out of alignment, and the fucking axle was loose ... Probably should have checked that one sooner.
March 27, 2016
Finally changed coil, as the old - and obviously once (or twice...) overheated - one was making me a bit nervous. Also hung Alice from the ceiling so the chassis alignment could finally be verified ... It was off a bit, as expected.
TourPak is now properly mounted, cleaned, and lined with a towel. As everyone knows...one must always carry a towel when traveling...
A gun is also not a bad idea to have handy as well.
August 7, 2016
Trip to Webster Swap Meet:
| Handlebars | $20.00 |
Picked up a pair of - (I think) - Heritage handlebars to replace the rather awkward stock FLT Buckhorn handlebars that made counter stearing impossible. And while the wrist angle is now much better, the pullback is way too far making the overall riding position quite cramped.
Current Project Cost: $3,368.44
I really need to find the right handlebars for Alice,
but the 10" center required by the stock dash
makes the options very limited.
October 1, 2016
Trip H&B Cycle:
| Handlebars | $20.00 |
After a rather long (funding) pause in the project, I finally got some cash together to spend some quality time shopping ... And after some questing through H&B Richard's junk pile, I scored what is to be known as the absolutely beyond perfect set of handlebars for Alice! From straight up (two up) running, to drag launch, to tossing her into a slide at 80+ these bars are exactly where I need them to be for comfortable control. While I haven't the slightest clew WTF these - most likely aftermarket - bars came off of, they were - at least - stamped with a (manufacturer unknown) part number of: 40-0207D
Current Project Cost: $3,388.44
I am at this point seriously debating on whether or not I should continue budgeting for the original FLTC frame mounted faring.
As these bars may not quite clear it...and if they don't it'll be money wasted. Because I am flat-out not - under any circumstances - taking
these the fuck off ... ever!
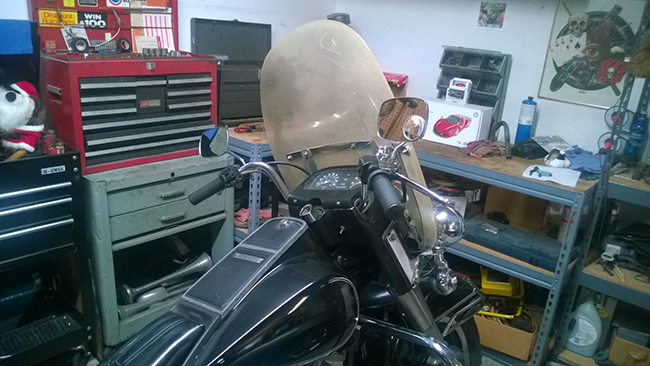
Abso-Fucking-Lutely Perfect!
October 15, 2016
Trip to Webster Swap Meet:
| Turn Signal Light Bar | $30.00 |
Picked up in anticipation of taking the turn signals out of the saddlebags during the conversion to the police style (hinged) latches. The bungie cord is starting to bug me...
Current Project Cost: $3,418.44
October 15, 2016
Online at eBay:
| R254KT Swingarm Bushing Upgrade Kit | $249.00 |
Current Project Cost: $3,667.44
She got a bit wiggly in a hard left - once... - once too often, so the suspension part of the project got moved to the top of the To-Do pile. I also found out that apparently the 1980-81 models have French wheel bearings - I have no idea how to feel about that - However I may need to side-burner an upgrade to the 82 (and up) model Timken bearings if anything else weird happens.
So while I had Alice's ass tore off for the swingarm bushing upgrade, I decided to dive into the police style latches, light bar, and turn signal move. This would prove to be quite an escapade as it got rather involved almost immediately.
Things on the accounting side got a bit messy at this point.
So to catch-up I'll just post this stack of receipts here.
May 5, 2016
Trip to H&B Cycle:
| Jiffystand Spring | $9.20 |
Current Project Cost: $3,676.64
October 9, 2016
Trip to Lowes:
| 3/4 x 1-1/4 Flat Washer - Pack of 2 | $0.89 |
Current Project Cost: $3,677.53
October 9, 2016
Trip to AutoZone:
| Rust-Oleum Gloss Black | $6.69 |
| Rust-Oleum Sandable Primer | $5.99 |
| 18 gauge wire green | $6.99 |
| 18 gauge wire black | $6.99 |
| 18 gauge wire white | $6.99 |
| 18 gauge wire yellow | $6.99 |
| (2) Turn Signal Flasher | $13.98 |
| Bondo Long Strand Filler | $20.99 |
Current Project Cost: $3,753.44
October 9, 2016
Trip to Ace Hardware:
| (50) Stainless 3/4 x 6-32 screw | $5.50 |
| (50) Stainless 6-32 flat washer | $5.00 |
| (50) Stainless 6-32 nylock nut | $11.50 |
Current Project Cost: $3,776.76
October 22, 2016
Trip to AutoZone:
| Rust-Oleum Truck Bed Coating | $10.17 |
Current Project Cost: $3,786.93
October 22, 2016
Trip to AutoZone:
| 5" Orbital Palm Sander | $29.99 |
| (2) pack 5" 60 grit sanding disks | $7.98 |
| pack 5" 150 grit sanding disks | $3.99 |
| pack 5" 220 grit sanding disks | $3.99 |
Current Project Cost: $3,835.64
October 30, 2016
Trip to Lowes:
| 5 Minute Epoxy | $6.35 |
| 1/16 x 1-1/4 x 3' Aluminum bar stock | $4.98 |
| 1/16 x 1/2 x 3' Aluminum Bar Stock | $4.98 |
| (4) 3/8 x 2-1/4 x 1/8 Rubber washer | $4.88 |
Current Project Cost: $3,856.83
October 31, 2016
Trip to Harley Dealer:
| (4) 53427-80 Lower Hinge Plate | $26.64 |
| (4) 90983-84 Upper Hinge Plate | $42.99 |
| (4) 53478-80 Backing Plate | $4.00 |
| (2) 53563-82 Cable Mount Bracket | $10.76 |
| (4) 8502 Semi-Tubular Rivet | $4.00 |
| (2) 90926-84 Saddlebag Lock Bracket | $15.31 |
Current Project Cost: $3,960.53
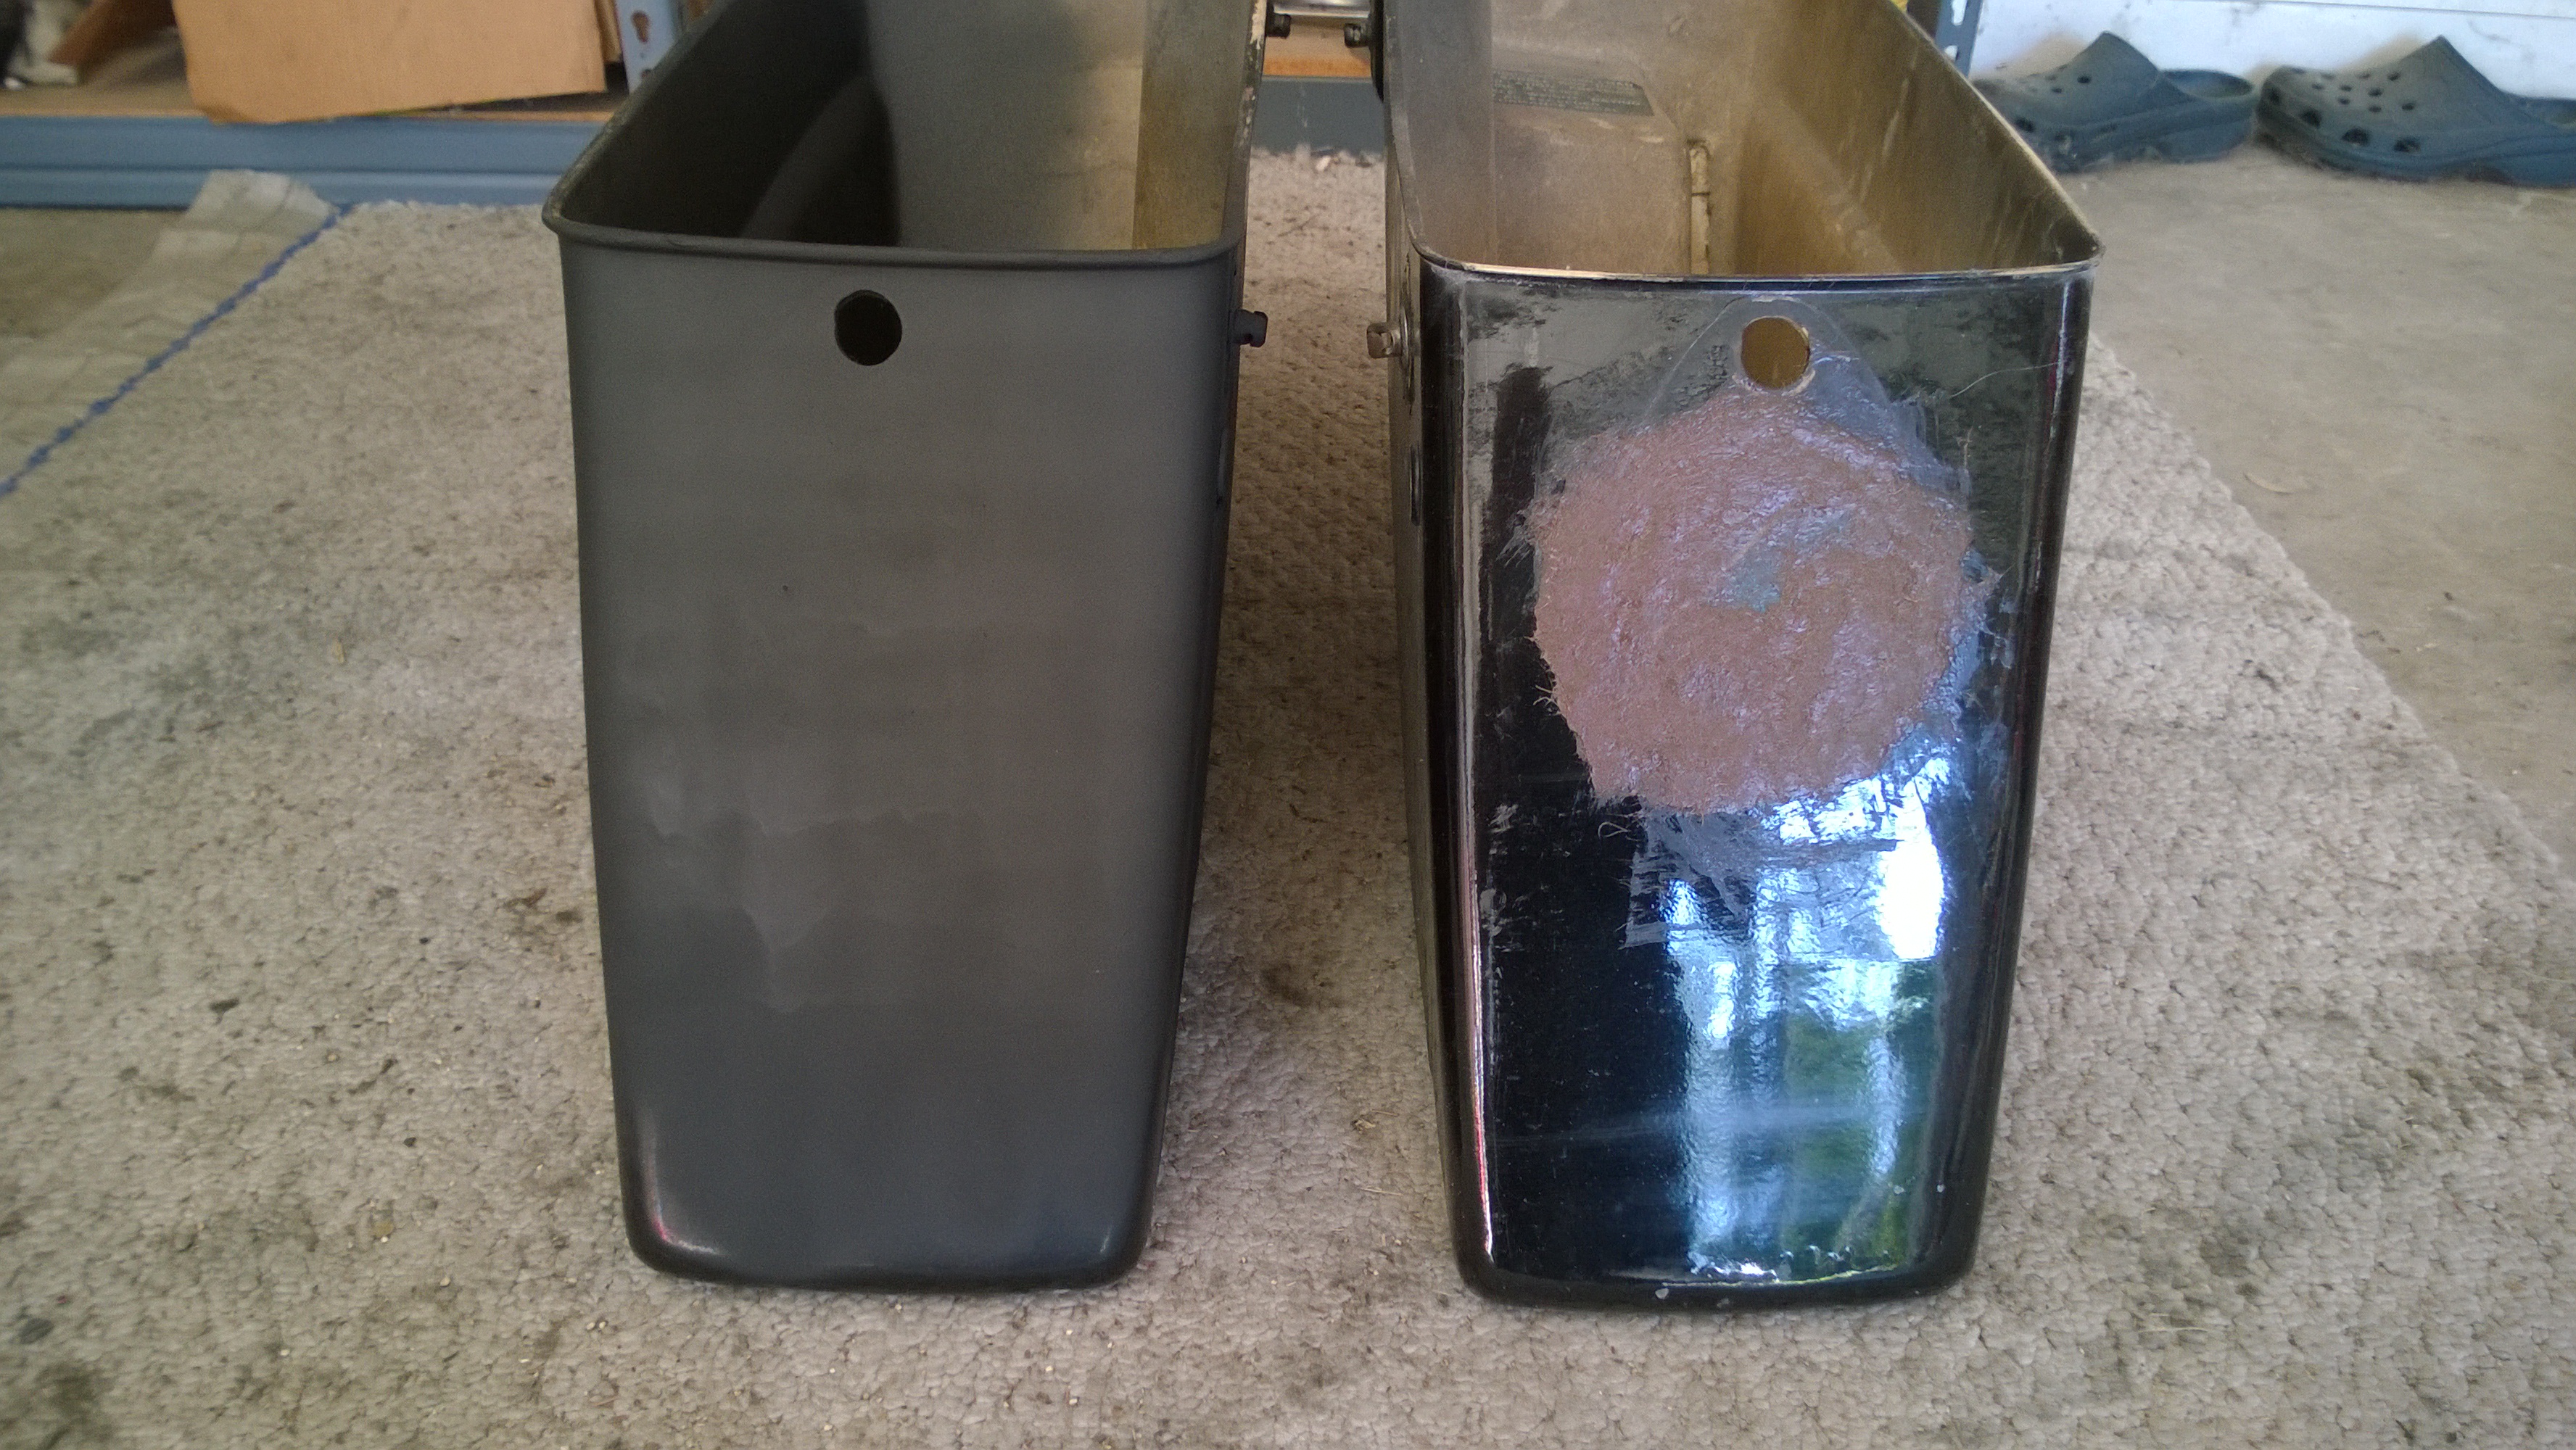
In process on plugging the old tail light holes.
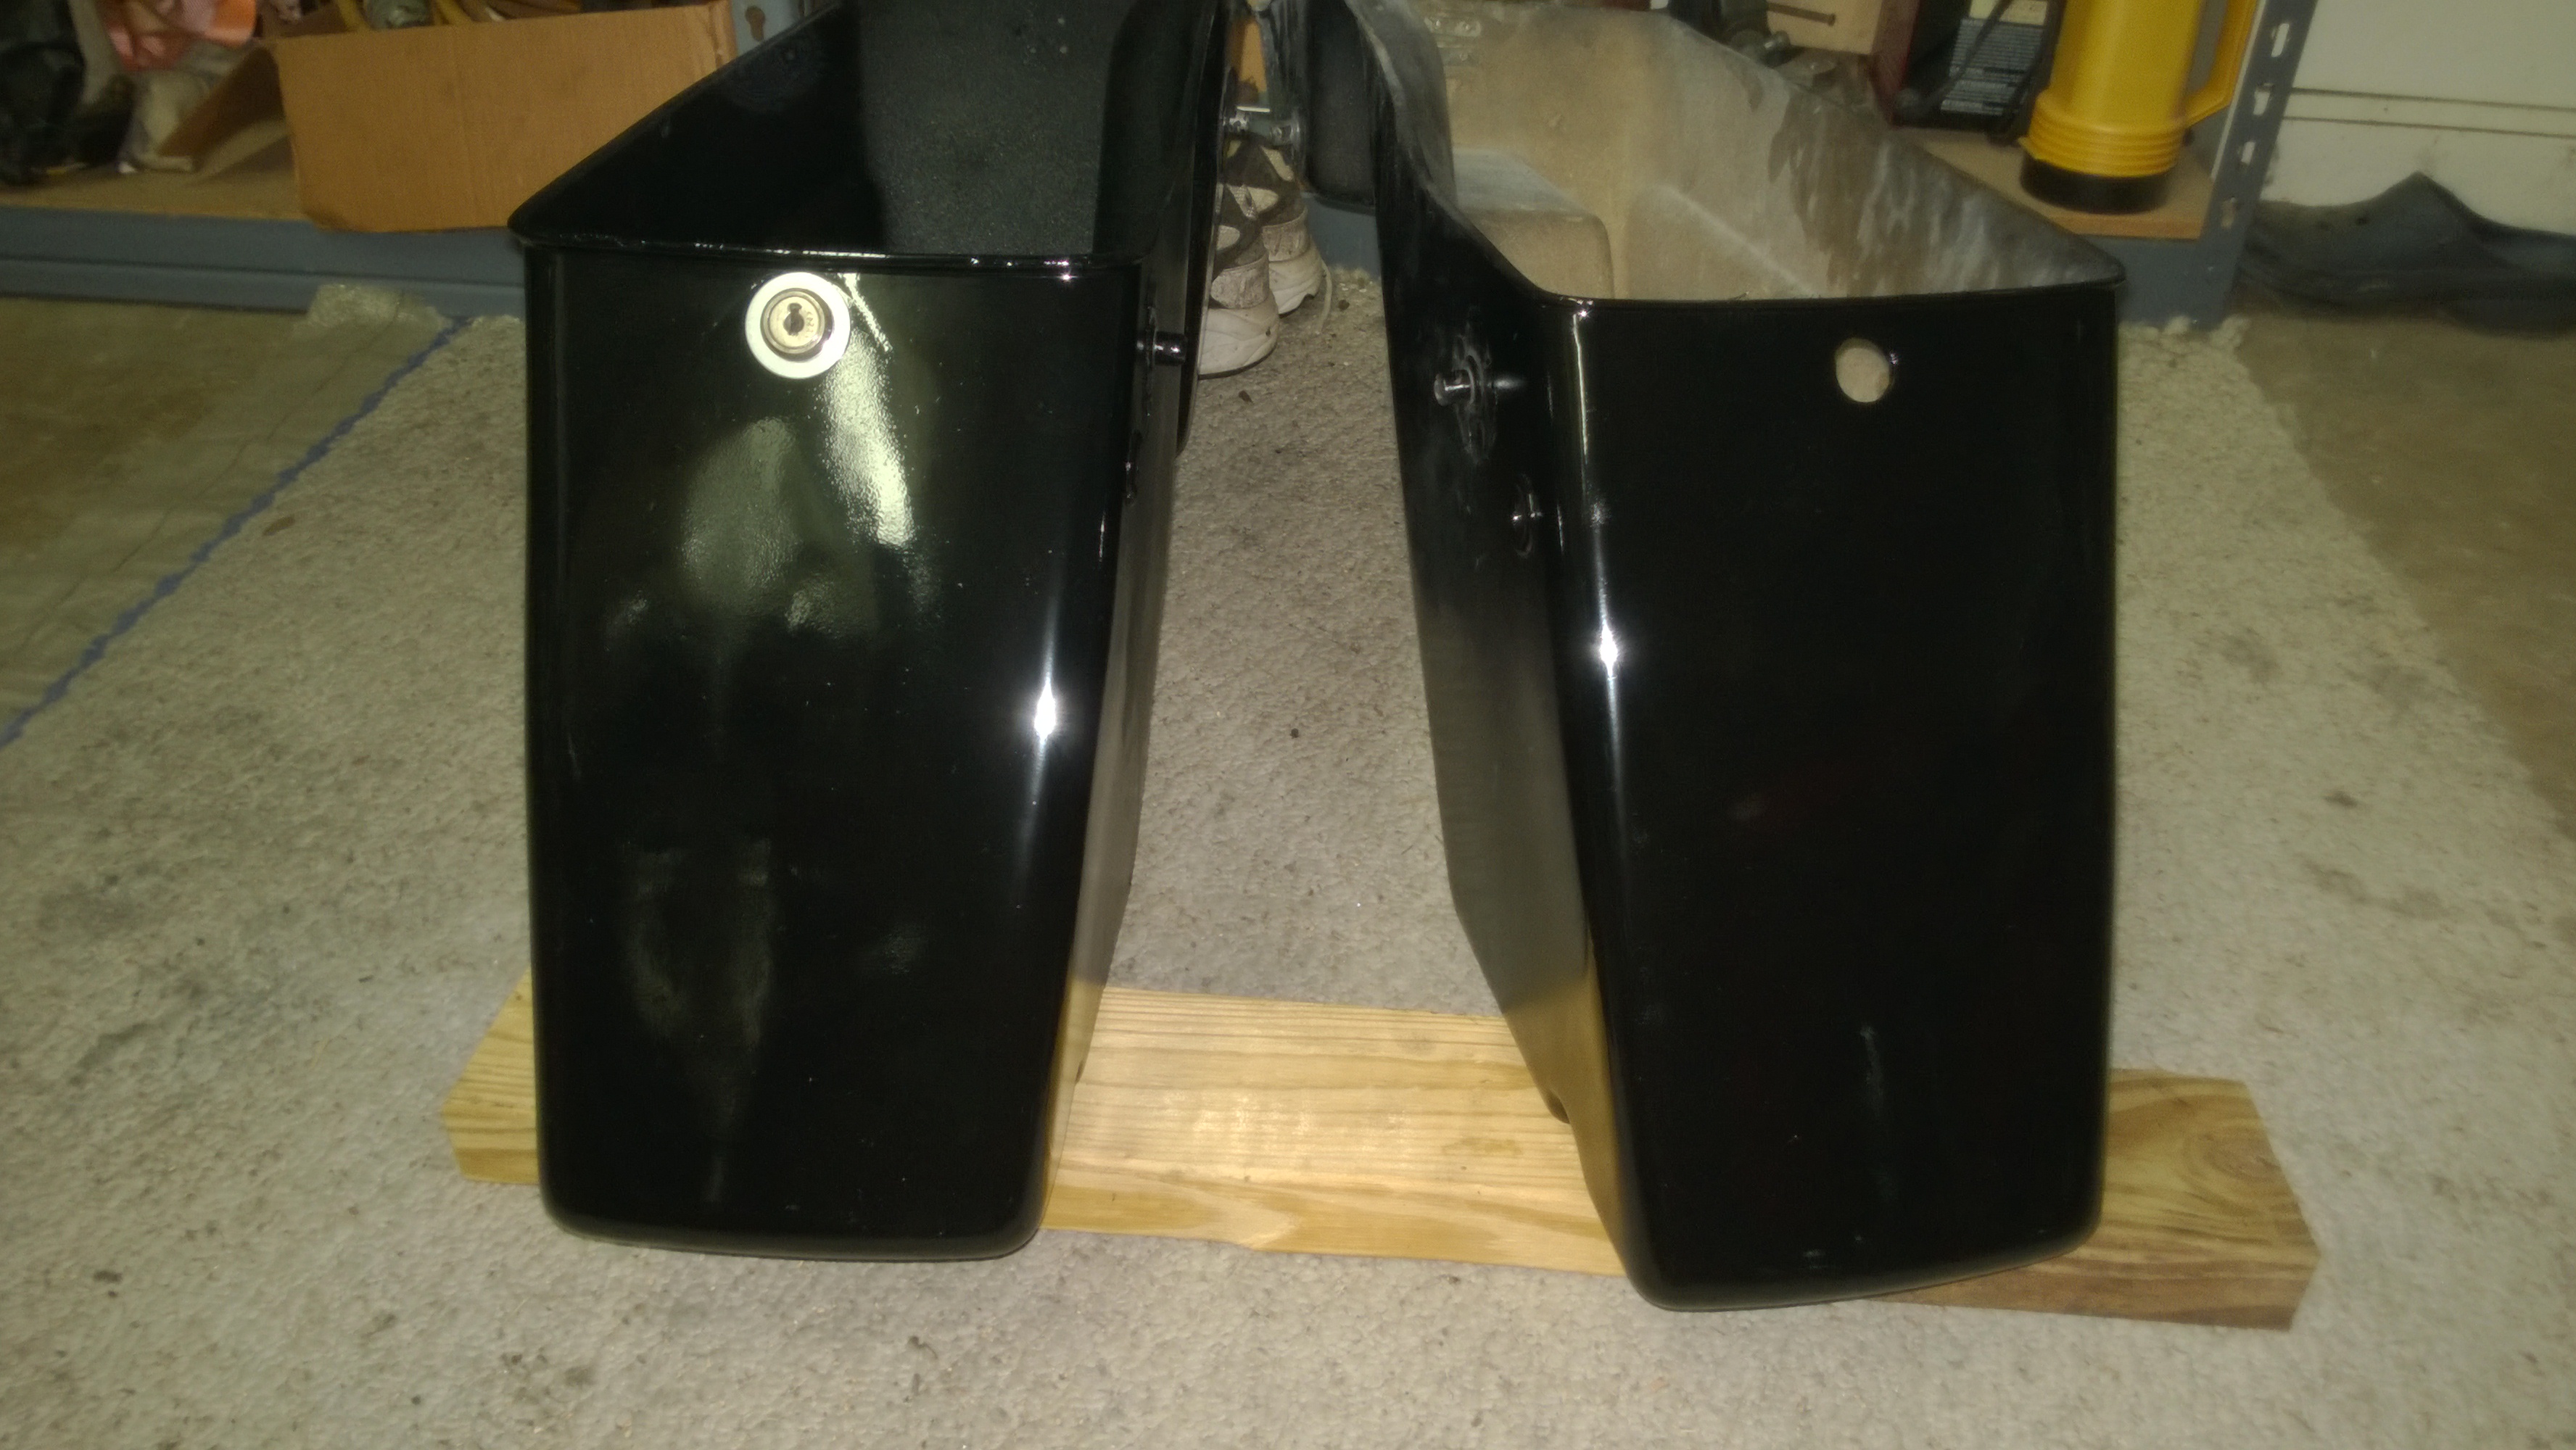
Left bag is done, right bag still needs to be shot with the liner coating.
Now I haven't had occasion to do much painting in the last 20 years (so I'm a bit rusty...), but fortunately a sleeper is supposed to look a bit rough around the edges. The bags above were shot with a rattle can ... And I really like sandable primer..
I forgot to get photos of the finished product at the time, but they do show up quite well in later photos of the next stage. So...We'll just have to go with that.
Bit of trivia... The tires Alice came out of storage with were (cheap-O's to start with) hard as a rock but still held air and had really good tread. So a few days after completion she was feeling a bit frisky as I ran her through a few paces on the way to work. While coming off the highway into a left turn, I dropped her down into 3rd at about 60MPH and popped the clutch in the apex to see if she'd behave well in a slide. The 10+ year old rear tire broke away with all the grace and subtlety of glass shattering ... But that was expected. The question was with the tire rather ungracefully fighting for traction like a scared cat on a waxed floor...would the new swingarm kit keep the ass still enough to keep things controlable ... And it did so beautifully.
Next...
Holy Shit - Whoa Mule!!!!!!!
Okay... So getting down to brass tacks, the stock brakes on an 1981 FLTC were quite exciting for all the wrong reasons. Or to put it bluntly, they're flat out fucking useless at anything over 60MPH ... And testing that theory in traffic can - quite easily - be fatal.
Hence the brakes are getting updated first to ensure that I can stop the silly bitch before any attempt at making her fast is pondered or explored let alone completed.
And now more shopping...
December 4, 2016
Trip to Webster Swap Meet (the shit is on now):
| Fork Assembly Complete (left) | 46495-09 | Fork Assembly Complete (right) | 46502-09 | Caliper Assembly (left) | 43027-08 | Caliper Assembly (right) | 44023-08 | Brake Disk (left) | 41809-08A | Brake Disk (right) | 41808-08A | $550.00 | Front Brake Master Cylinder | 44551-08E | Clutch Master Cylinder | 36700056B | $175.00 | 08 Handlebar Switches Complete | $60.00 |
Current Project Cost: $4,745.53
Everything Must Go! Well, Except for the trees, they're the only thing reusable.

So the question now is, will her new legs reach the ground??.
The answer (1981 vs. 2009), suprisingly is yes. While the 2009 forks are 3/8 of an inch shorter, they are also much stiffer. So the rider seated ride height is identical, if not just a bit taller as the 2009 forks are designed to handle quite a bit more vehicle weight.
December 16, 2016
Trip to Harley Dealer:
| (4) Caliper Bolts | 44160-00 | $8.69 |
Current Project Cost: $4,754.22
Hay, I got everything I needed at the Swap Meet ... Except for the stuff that wasn't there.
December 16, 2016
Trip to H&B Cycle:
| 43493-87A | ||
| V-Twin 42-1/4" Throttle Cable Set | 36-0861 | $40.00 |
| S&S Super E/G Throttle Cable Guide | 11-2338P | $20.00 |
| 2008+ Clutch Lever and Bracket Assy. | $30.00 | |
| Brake Line Front (non-ABS) | 43350-08 | $60.00 |
| Brake Rotor (hub) Shim Kit | $20.00 | |
| 20 80's era Terminal Pins | 72039-71A | $10.00 |
| 20 80's era Terminal Sockets | 72038-71A | $10.00 |
Current Project Cost: $4,944.22
After purchasing the new (used) front wheel, it was discovered that it wasn't need due to a previous owner already having done the conversion to the late 80's wheel with Timkin bearings. So fretting about the silly French (early 80's front wheel) needle bearings was ultimately unnessary. The wheel was later swapped for other stuff.
The axle however is another story...
The 2000 and up front end I'm using takes a 25mm axle, and the 1982-1999 front wheel I had takes a 3/4" axle (~19mm)...which is a bit of an issue. Not to mention that the "head" of the 25mm axle is considerably larger on the (right fork) clamping side, and that can't be allowed to wiggle without creating a rather serious safety issue. Now the simple answer sounds like just getting the shaft of the 25mm axle turned down to 3/4" but it's a hollow axle...and the inside of the hollow part that runs the full length of the axle is .730". So since 3/4" is .750, that would leave only 0.010" of materal left to try and hold the front wheel in place ... And frankly, I ain't that fucking brave.
Hence a Plan B was needed...
The head of the 25mm axle is 1.118" in diameter, the head of the 3/4" axle is .874" in diameter, and that leaves a .244" gap that needs to get filled with something solid enough to clamp on to. A quick trip to Lowes (a large chain hardware store) got me just what I needed to make the 3/4" axle work. They carry aluminum bar stock in various - albeit standard - sizes. One of those standard sizes is 1/8" x 1-1/2", and the axle mounts just so happen to be exactly 1-1/2" wide ... So now all I have to do is hand mandrel form a shim for the axle head and I can use the original axle on the new front end.
This took about two hours to complete, but fit perfectly when finished. The shim thickness after forming is .120", which is about as close to perfect as one can expect out of a hand job. I also had to make a second shim for the left fork where the axle necks down a 16th of an inch out of 1/32" material to keep everything aligned properly. It was a snug press fit, and it held the axle with less play than it had had in the original stock fork leg.
The only other modification required was drilling out the brake rotor mounting holes for the earlier model 3/8" bolts, and then installing them with a shim kit to keep them from moving around on the bolts due to the slight (but enough to matter) difference in hub diameter. The rest of the job was pretty straight forward bolt on as usual stuff.
![]()
Axle shim press fit onto the axle and then clamped in place.
|
Note: I am not in any way recommending that anyone else try using this option, as it is extremely easy to get it horrifyingly dangerously wrong! It's simply the route I chose to take, because I wanted to see if I could pull it off. |
Now on to the handlebar controls
Since the handlebars I had weren't dimpled for the wiring they had to be drilled. Not a big deal (if you know how), and it looks much cleaner when
done that way. The only hiccup was that the turn signal switches are wired differently on the later models because they're self canceling. So I had
to slide the wires partialy out if their sheathing to seperate the turn signal switches from horn and brake light switches, add a wire for the old
style turn signal flasher, and then coax it back out through the sheathing.

Western Union Splices are Your Best Friend in Tight Places
From 1 piston on a 10" disk, to 4 pistons on a 12" disk (rounding up from 11.8") x2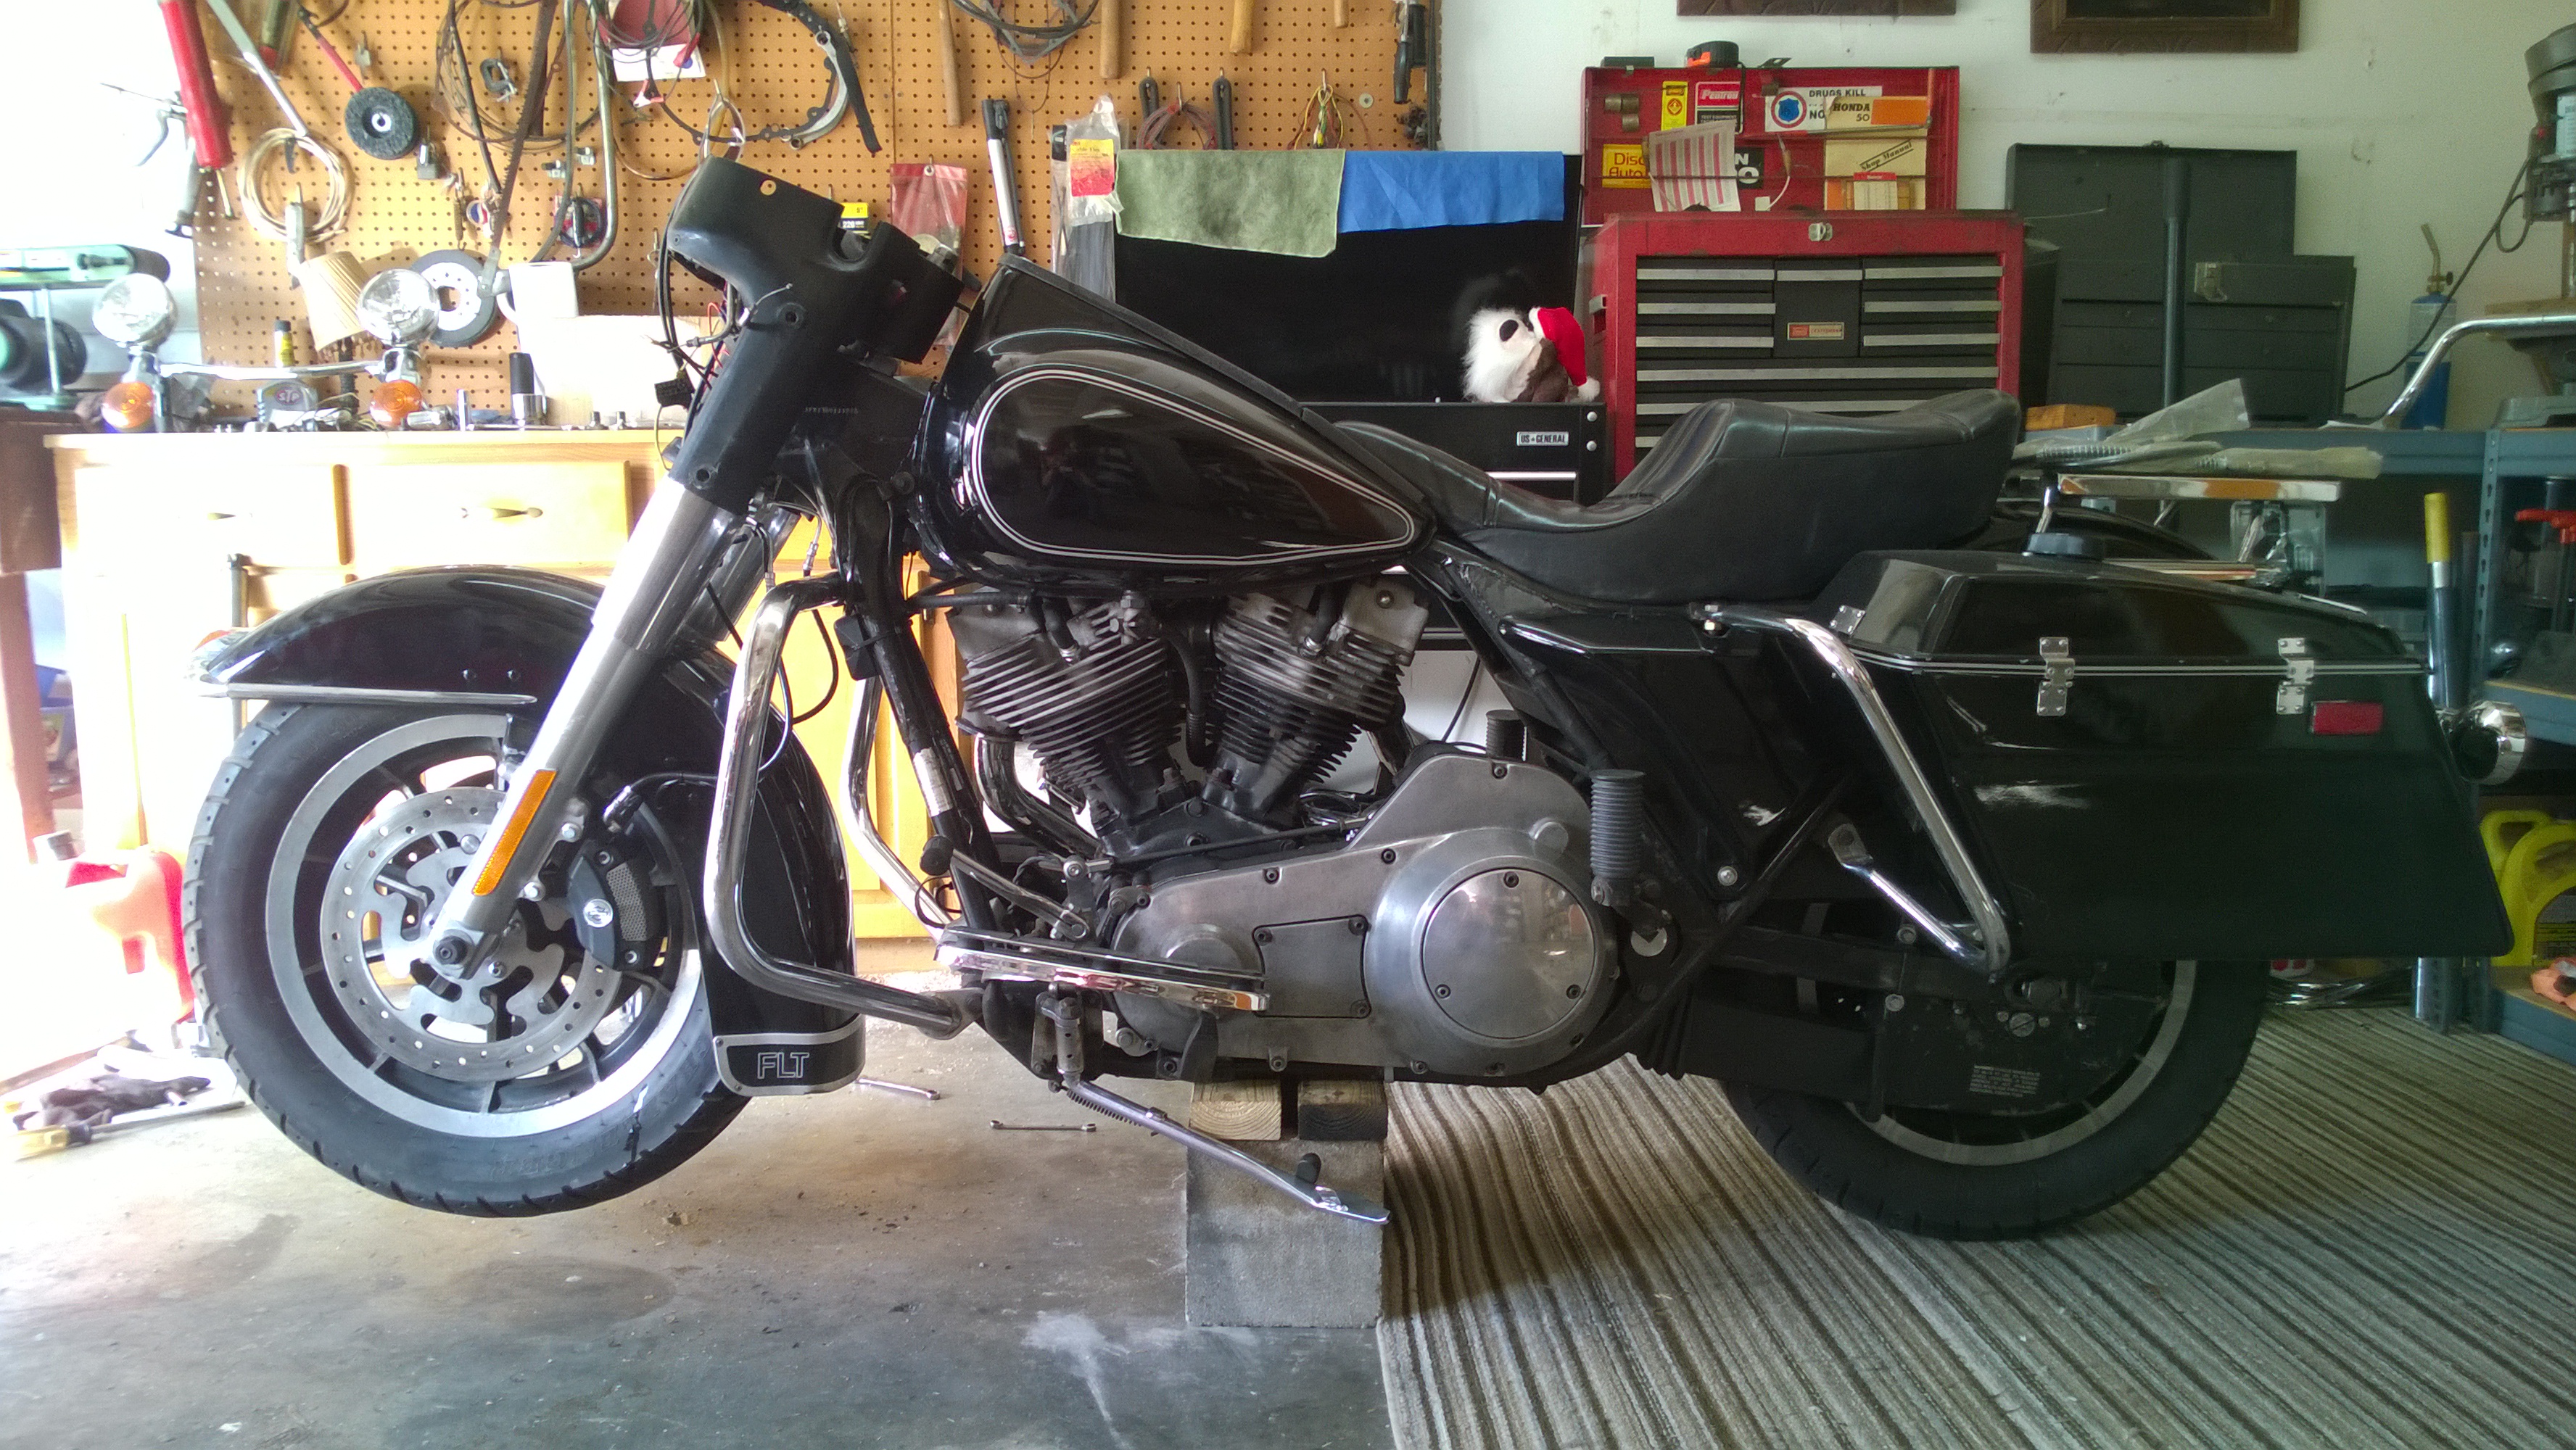
Now that is a serious stopping power upgrade!
|
Side Note: The hinged police style saddlebag latches conversion can be clearly seen in the photo above. Much unlike in the photos I forgot to take of them earlier. |
Alice Back Together After Surgery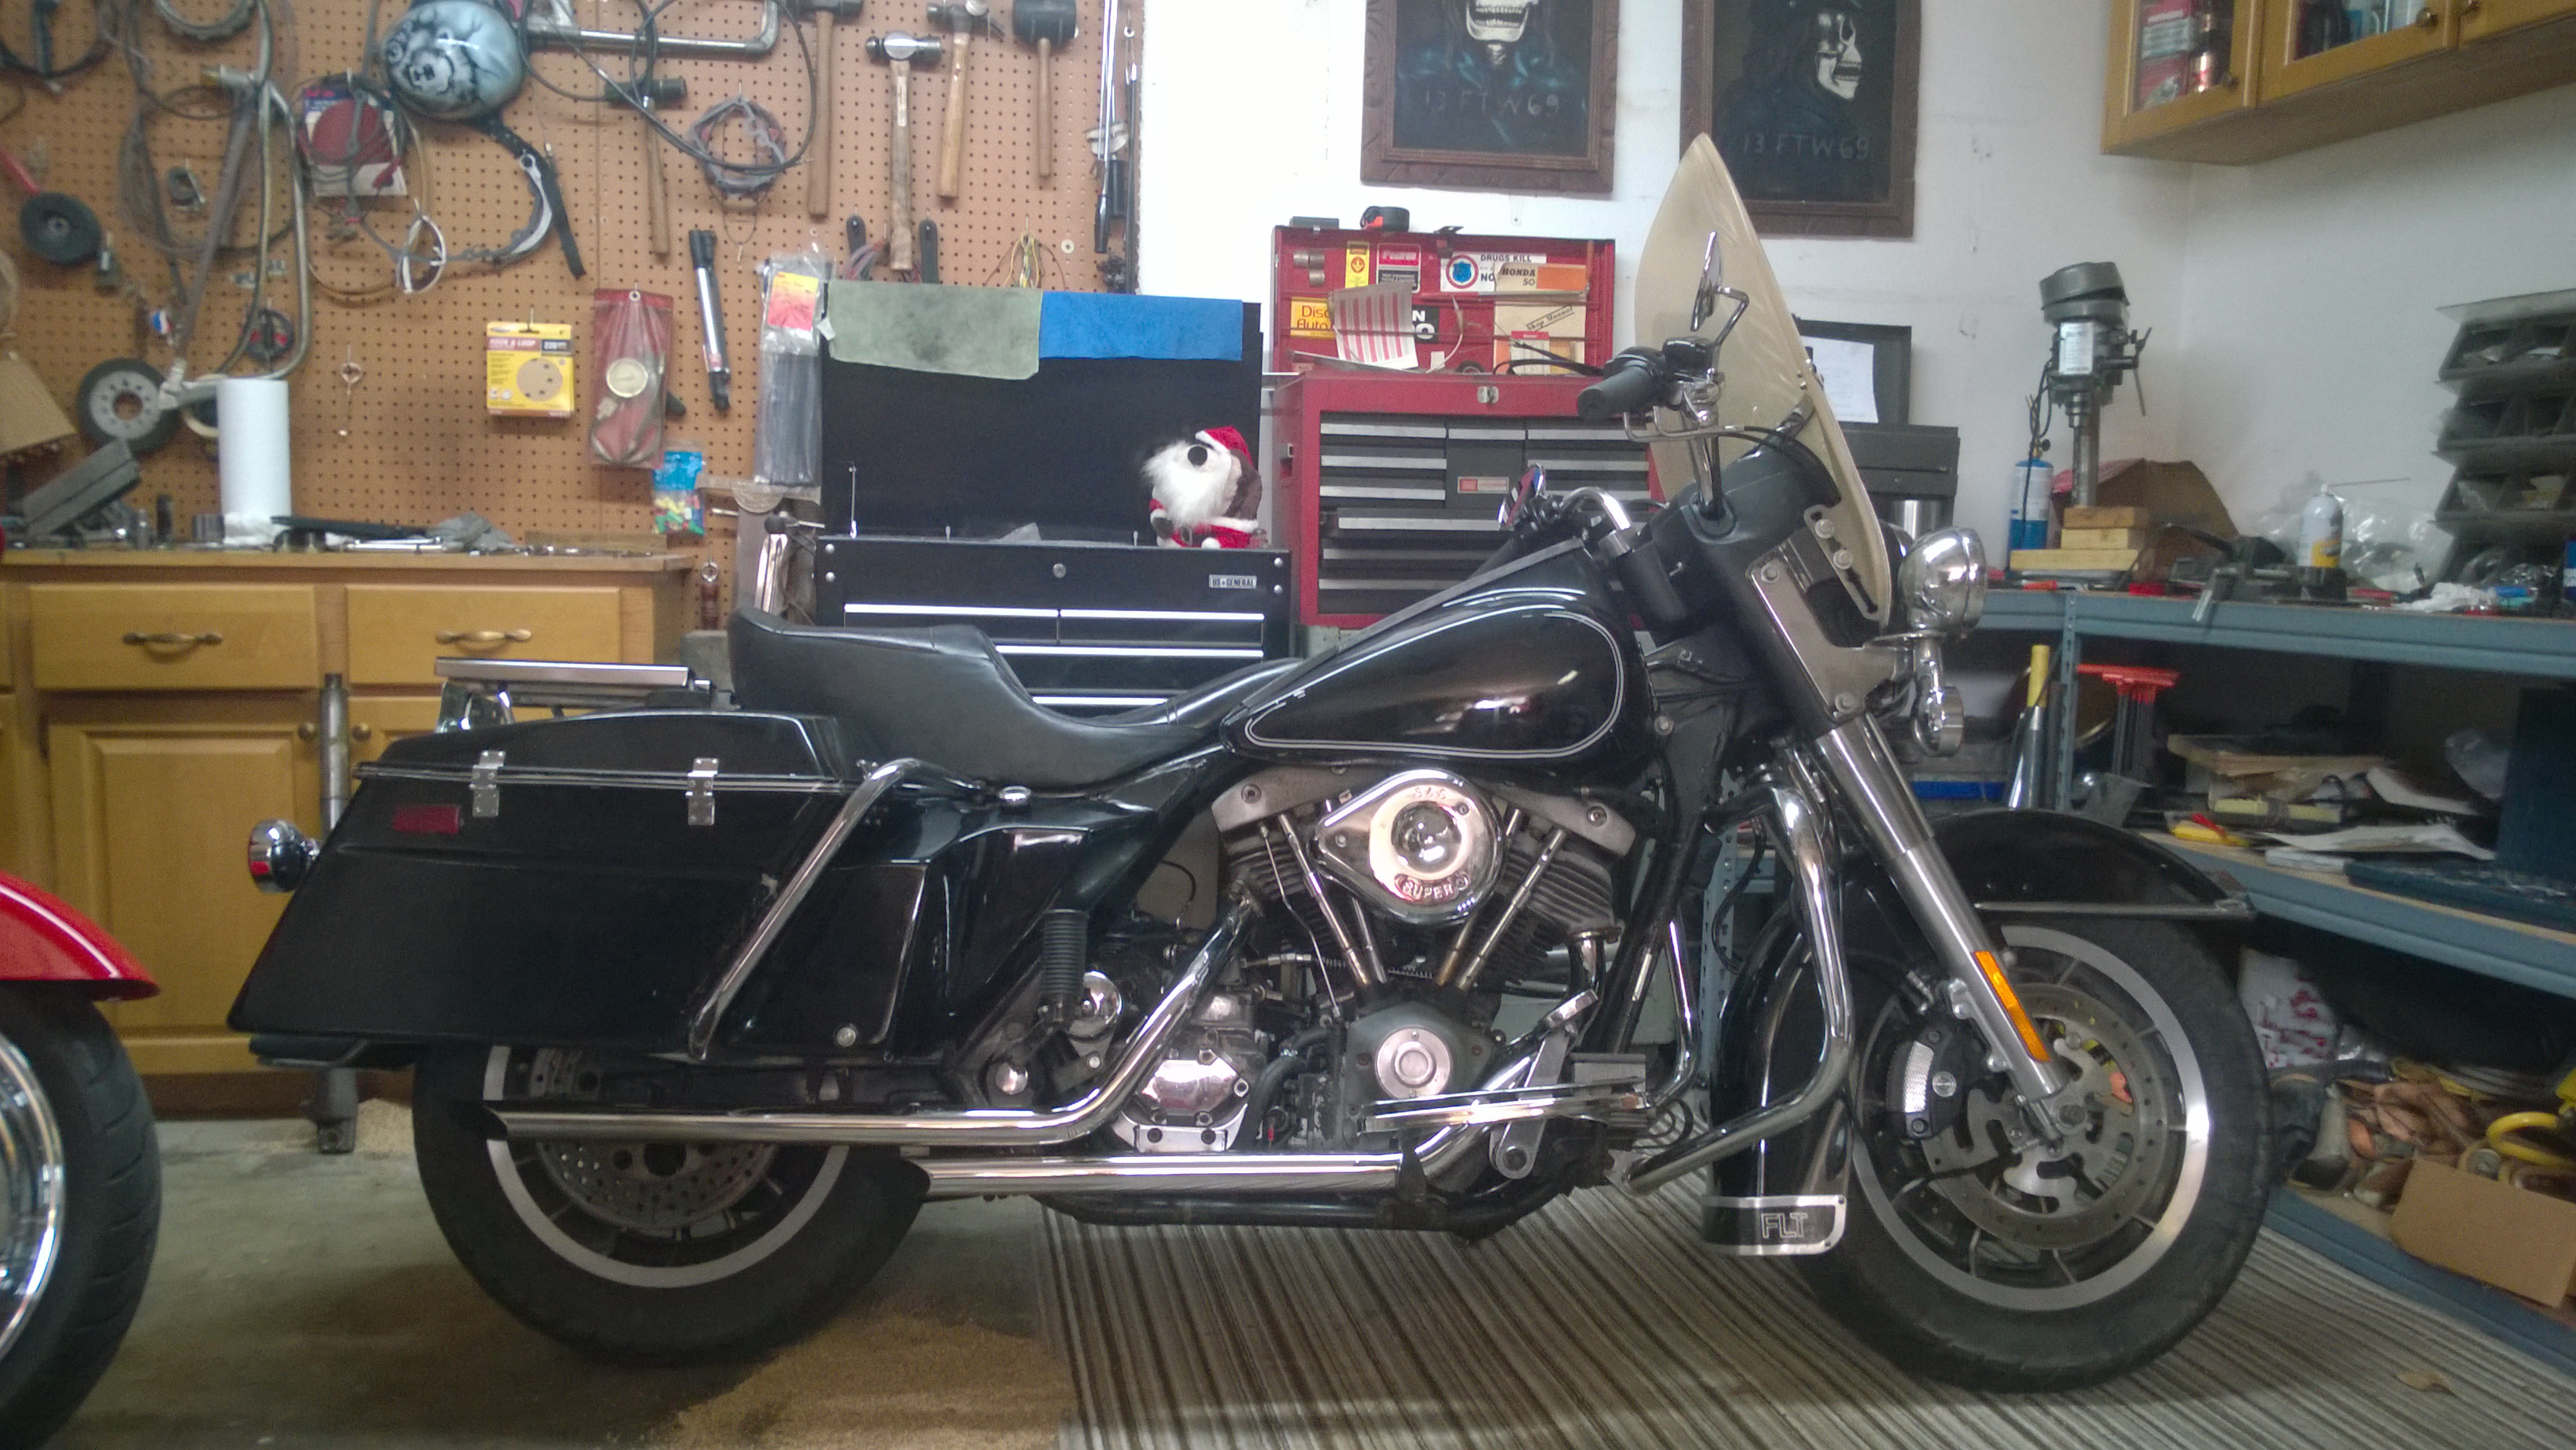
After the test ride I'm pretty sure she'll do a stoppie if I push it hard enough.
Handling is also vastly improved with the new forks.
Handlebar controls are now all from the 21st century.
Friday, December 16, 2016
Milestone 4: Brake and Suspension Mods Complete!
Now I can finally look into making her fast...
December 21, 2016
On the odd chance that anyone noticed that the windshield in the photos above was opague at best ... So did Wolf. Who then proceeded to donated a Mother's Headlight Restoration Kit to the project, with the specific instructions that it be used immediately...if not sooner. Wolf remembers back when I first got the 87 FLHTP it came off of, and it was a tad shaky even back then. But it said Sheriff on it so - it was cool - I kept it...for another 20 years. On the bike. And I'm still using it on Alice ... Because it says Sheriff on it (so it's cool..). Learning is sometimes an arduous process...
Anyway... I took a run at the (antique) windshield with the Restoration Kit for about an hour. And managed to bring it back from
completely opague, to something that might actually qualify as translucent. Which is actually a huge improvement overall, since when I originally
dug it out of the shed it had all the optical clarity of concrete...
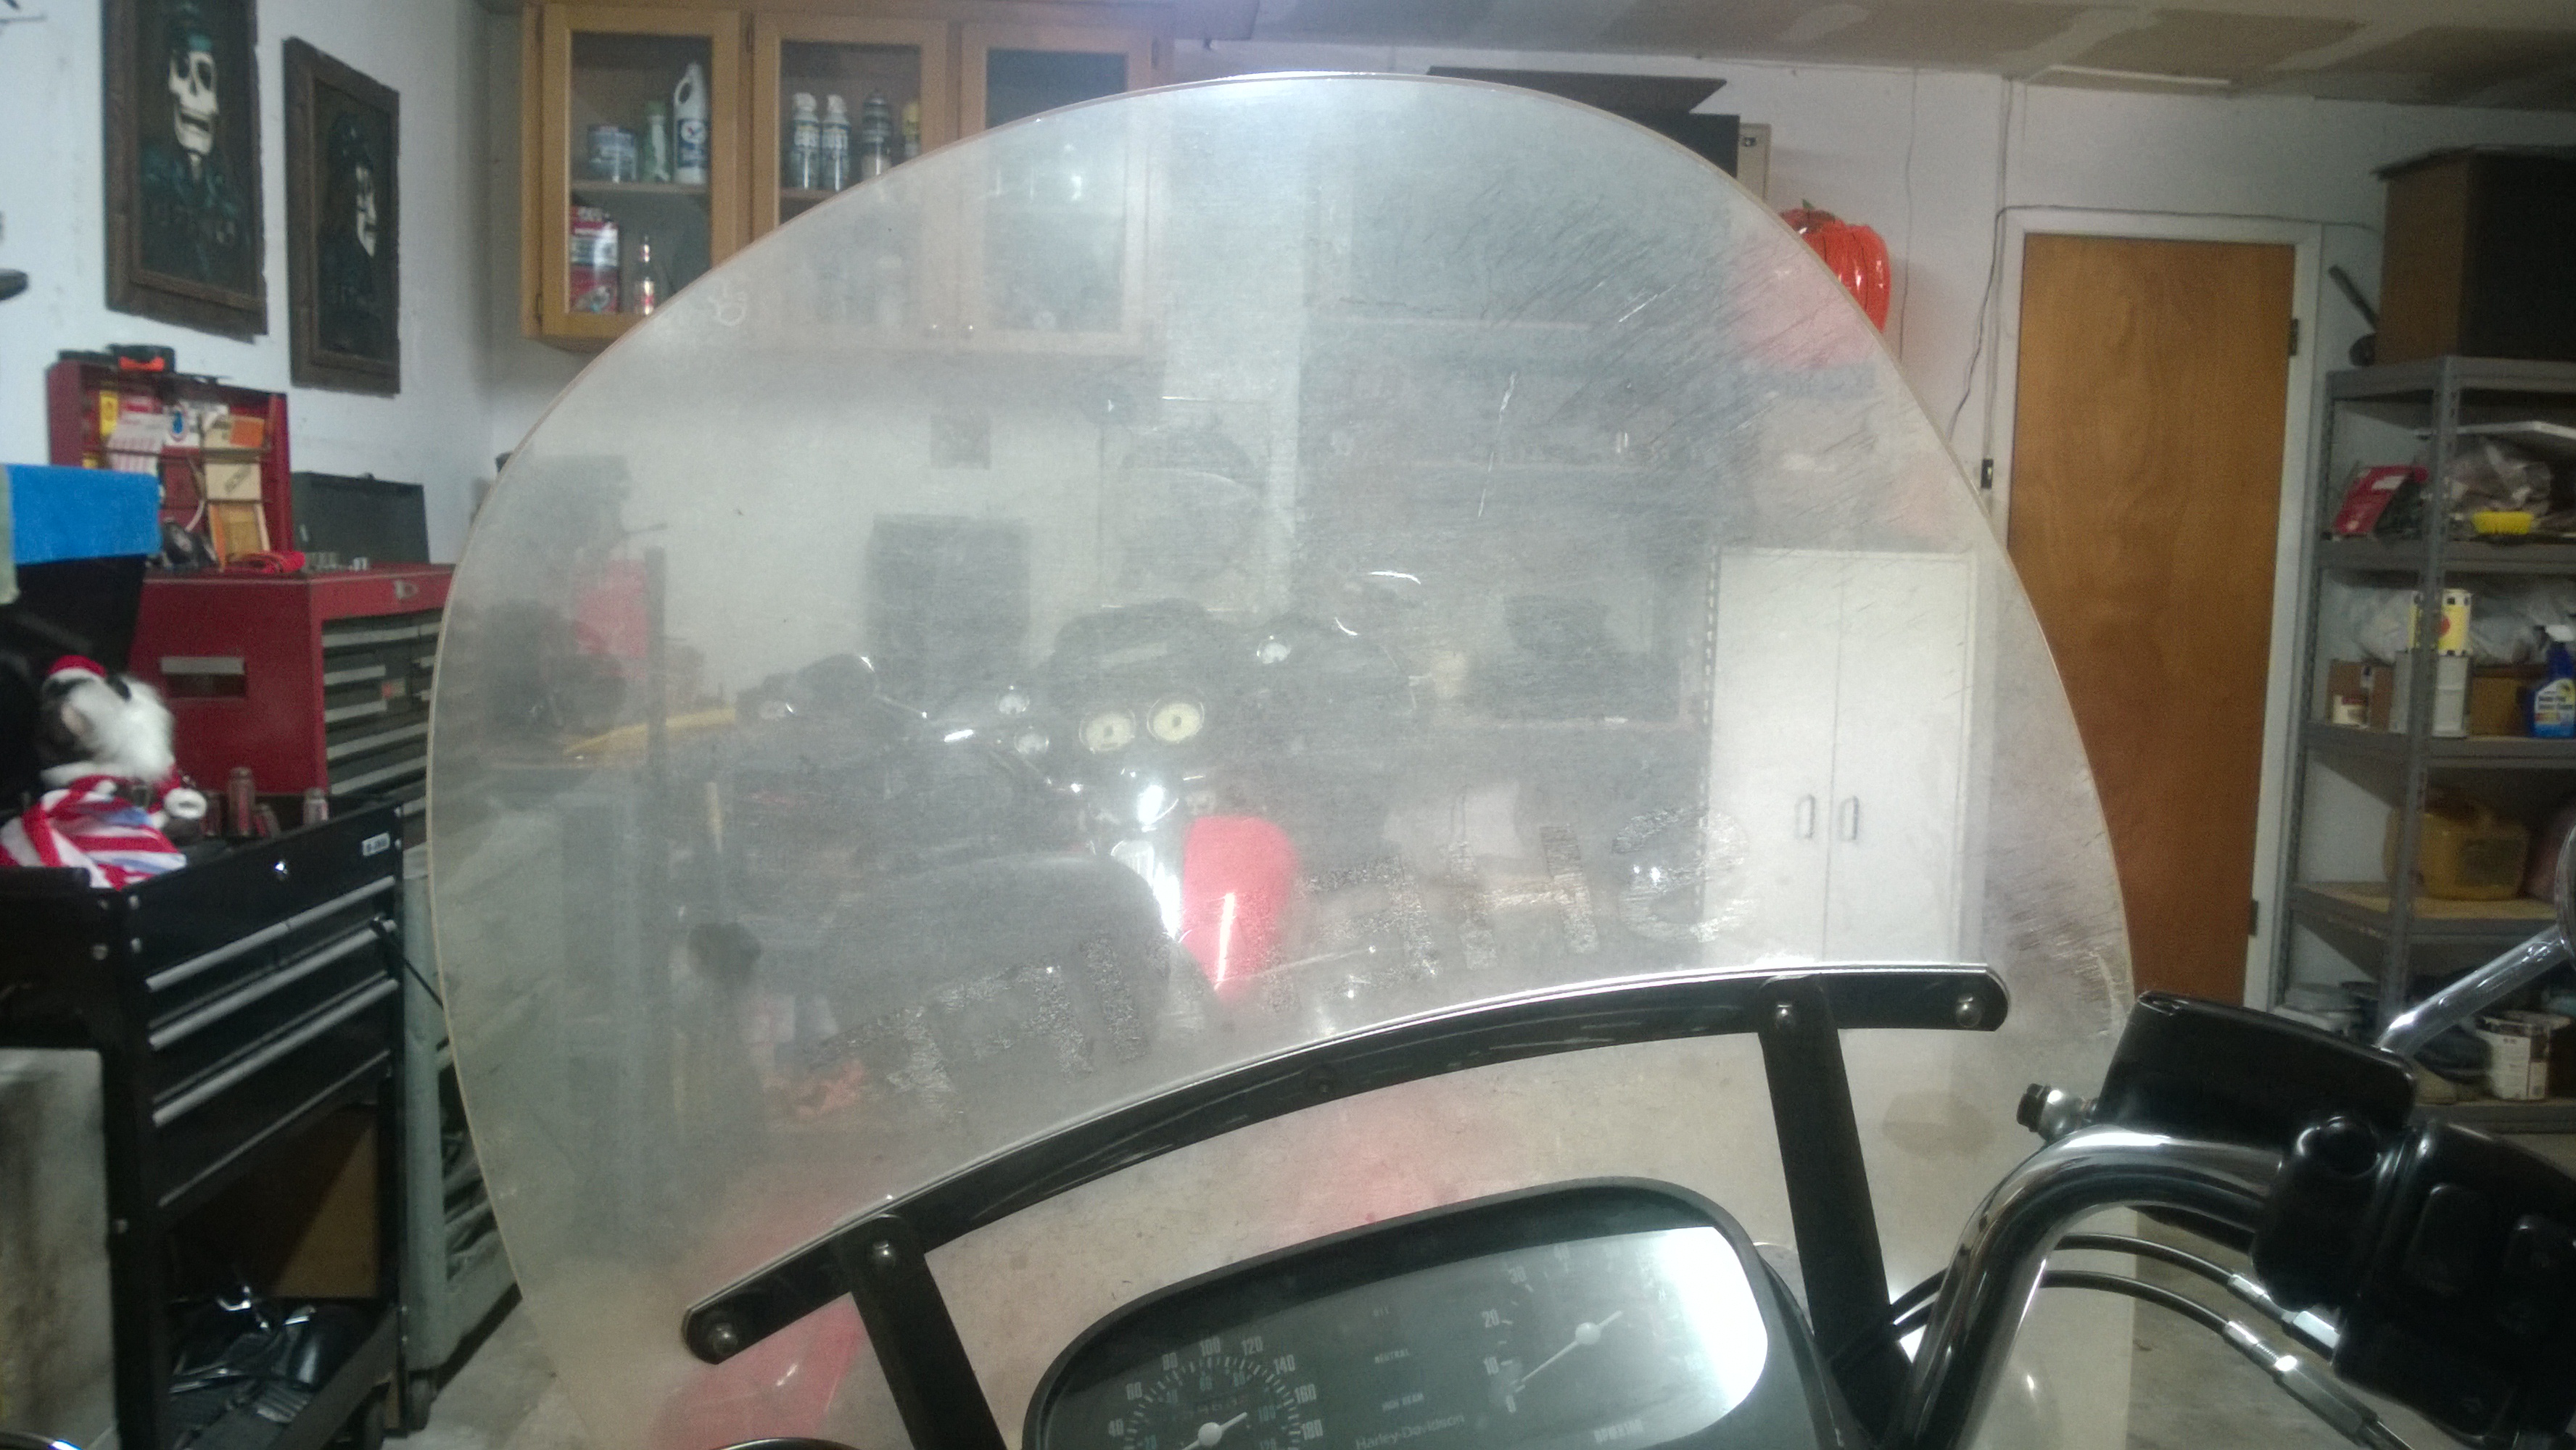
Notice you can't see the right saddlebag of the bike in front of Alice through the bottom of the windshield,
because that area wasn't treated yet. I still look over the windshield, but at least now I don't have too.
So... According to the slightly confused looking but very pleasant
fellow at the local recycling center's weigh-in station
Alice's
Current Weight:
720lbs
She's Been on a Bit of a Diet
| Peak HP | ET | Speed | Plausibility Description |
| 65 | 13.935 | 97.812 | These are the Bone Stock Numbers |
| 100 | 12.071 | 112.915 | Just Throwing in an Even Number |
| 132 | 11.000 | 123.914 | Now that sounds totally doable (Not...) |
| 176 | 10.000 | 136.305 | This Target Will Require Nitrous... |
equation as well, I may need to go on a diet to help her numbers.
But Seriously...
The ultimate plan for the engine is to put an Axtel 3-13/16 Bore Kit on top of a 4-1/2" stroke, with a 9.5:1 compression ratio,
dual plug ported heads (and maybe - just maybe - a nitrous kit) ... But that's going to take -(building a complete other engine
- $$$)- quite a while to pull off. So for now I'll just try to scare up a cam and play with the gearing a bit to see if I can
make her fast enough to be a pain in the ass. 
December 24, 2016
Online at eBay:
| 1981 Harley-Davidson Tour Glide - FLT Service Manual | 99483-81 | $39.99 |
Current Project Cost: $4,984.21
January 23, 2017
Online at eBay:
| Handrail for Solid Mounted Seat | 91583-83 | $75.00 |
Current Project Cost: $5,059.21
For now the shop is closed to go riding..
Chapter 2 - Daytona Bike Week 2017
Project Alice: Transmission & Driveline Phase
| Visits to Date: | 5331 |